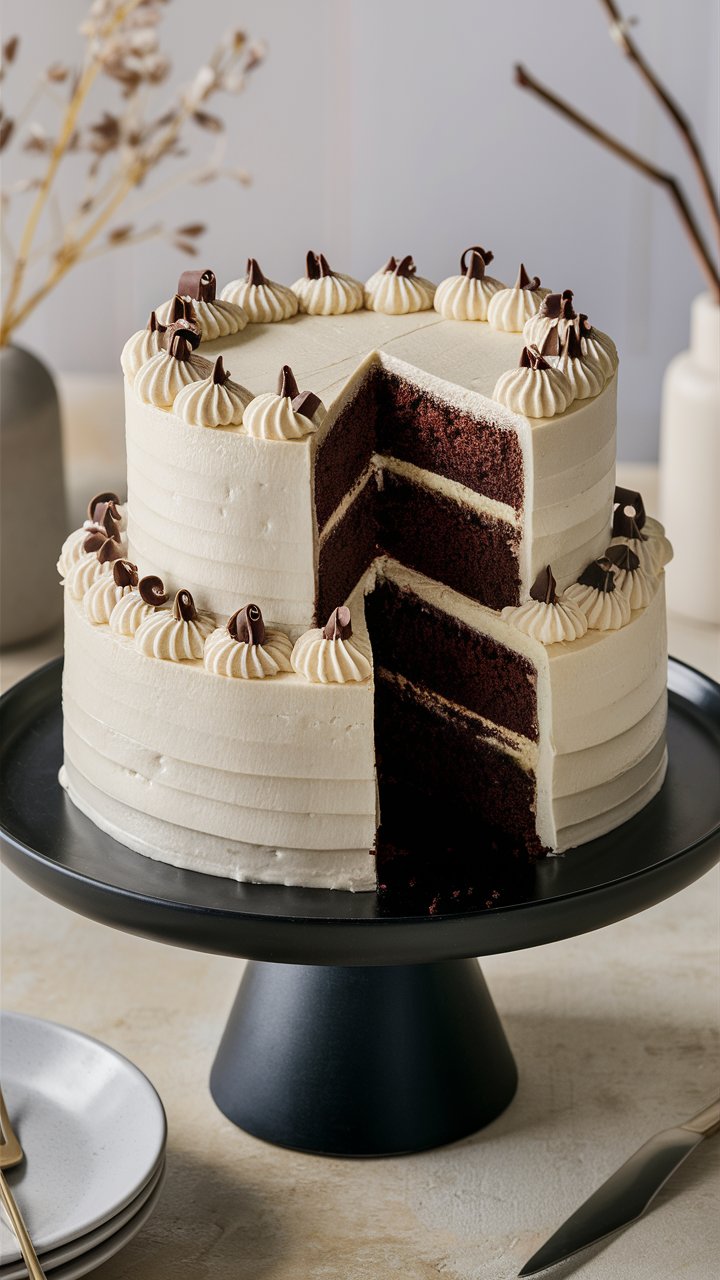
The Ultimate Guide to Chocolate Cake with Cream Cheese Frosting 2025
There’s something timeless about a good chocolate cake. But pair it with a velvety cream cheese frosting? Now, you’ve created a dessert that’s not only indulgent but also sophisticated and surprisingly balanced. The slight tanginess of the cream cheese perfectly complements the deep, rich cocoa flavor of the cake, creating a harmony that’s irresistible to dessert lovers.
Whether you’re baking for a special celebration, a weekend treat, or simply to satisfy a chocolate craving, this chocolate cake with cream cheese frosting is a guaranteed crowd-pleaser. With the right techniques and tips, even beginner bakers can achieve bakery-level results at home.
Let’s dive deep into this rich, moist, and delightfully frosted masterpiece.
Why You’ll Love This Recipe
This isn’t just another chocolate cake. This recipe has been developed with care to bring you:
- Moist, tender cake layers that don’t dry out even after days.
- Tangy, fluffy cream cheese frosting that complements the cocoa richness.
- Simple, step-by-step guidance for consistent results every time.
- Ingredient flexibility to accommodate dietary needs or pantry limitations.
- Scalable portions for everything from cupcakes to large celebration cakes.
Ingredients: What You’ll Need
Here’s a detailed list of what you need to make this cake from scratch. We’ve also added substitutes for flexibility.
For the Chocolate Cake Layers
| Ingredient | Amount | Substitutions |
|---|---|---|
| Hot Milk | 150g (½ cup + 1½ tbsp) | Almond, oat, or soy milk |
| Cocoa Powder | 60g (½ cup) | Unsweetened Dutch-process or natural |
| Unsalted Butter | 130g (½ cup + 2 tbsp) | Margarine or vegan butter |
| Cake Flour | 225g (1¾ cups) | All-purpose flour + cornstarch* |
| Sugar | 335g (1¾ cups) | Brown sugar (for denser texture) |
| Baking Soda | ½ tsp | Can’t be skipped |
| Baking Powder | 1 tsp | No substitute recommended |
| Eggs | 3 (150g) | Room temperature |
| Vegetable Oil | 100g (½ cup) | Canola, grapeseed, sunflower oil |
| White Vinegar | 2 tsp | Apple cider vinegar |
| Vanilla Essence | 1 tbsp | Pure vanilla extract |
*To substitute cake flour: Use 1¾ cups all-purpose flour minus 3½ tbsp, then add 3½ tbsp cornstarch. Sift together before using.
For the Cream Cheese Frosting
| Ingredient | Amount | Substitutions |
|---|---|---|
| Unsalted Butter | 300g (1¼ cups) | Plant-based butter for dairy-free |
| Icing Sugar | 300g (1½ cups) | Powdered sugar |
| Cornstarch | 10g (1¼ tbsp) | Tapioca starch or omit if sugar is firm |
| Full Fat Cream Cheese | 600g (2¾ cups) | Use block-style, not spreadable |
| Vanilla Essence | 1 tbsp | Optional but enhances flavor |
Tools You’ll Need
- Three 6-inch or two 7-inch cake tins
- Mixing bowls
- Hand or stand mixer
- Spatula and whisk
- Digital kitchen scale (recommended)
- Measuring spoons
- Offset spatula for frosting
- Cooling racks
Step-by-Step: Making the Perfect Chocolate Cake with Cream Cheese Frosting
1. Preheat and Prep
- Preheat your oven to 330°F (165°C).
- Grease and line the bottoms of your cake pans with parchment paper.
2. Make the Cocoa Mixture
- Heat milk until steamy (about 1½ minutes in the microwave).
- Whisk in the cocoa powder until smooth and lump-free.
- Let it cool slightly.
3. Mix the Dry Ingredients
In a large bowl, sift together:
- Cake flour
- Sugar
- Baking soda
- Baking powder
4. Add Butter and Cream the Base
Add the softened butter to the flour mixture and mix on low speed until it resembles damp sand (about 2 minutes). This is the reverse creaming method, which helps avoid overmixing and creates a tender crumb.
5. Add Eggs One by One
- Add eggs individually while mixing on medium speed.
- Scrape down the sides of the bowl between additions.
6. Incorporate Wet Ingredients
Now pour in:
- Cocoa milk
- Oil
- Vinegar
- Vanilla essence
Mix on medium-high for about 3 minutes until fully combined.
7. Bake the Cake Layers
- Divide the batter evenly into the prepared pans.
- Bake for 27–35 minutes, or until a toothpick inserted into the center comes out clean.
- Cool in pans for 10 minutes, then turn out onto wire racks.
Making the Cream Cheese Frosting
1. Cream the Butter
Beat room-temperature butter on high for 5 full minutes. This creates an airy base for your frosting.
2. Add Sugar and Cornstarch
- Sift the icing sugar and cornstarch.
- Gradually add to the butter and beat for another 5 minutes until fluffy.
3. Add Cream Cheese
- Add cream cheese and vanilla.
- Mix just until smooth (don’t overbeat or it can turn runny).
4. Chill (Optional)
For a firmer texture, refrigerate the frosting for 20–30 minutes before using.
Assembling the Cake
1. Level the Layers (Optional)
If your layers domed during baking, trim the tops using a serrated knife.
2. Frost the Cake
- Place the first layer on a cake board or plate.
- Add a thick layer of cream cheese frosting.
- Repeat with the remaining layers.
- Crumb coat the outside (thin first coat), chill for 15 minutes, then frost the entire cake.
3. Decorate
Decorate with:
- Chocolate shavings
- Fresh berries
- Piped borders
- Ganache drizzle
- Or keep it rustic with swoopy swirls
Baker’s Secrets to a Perfect Cake
- Use a digital scale for accurate measurements—especially with flour and sugar.
- Room temperature ingredients are key to even mixing and better texture.
- Avoid overmixing. Stop mixing as soon as the batter is combined.
- Use fresh baking soda/powder. Expired leavening agents = flat cake.
- Cool completely before frosting—warm cake melts the frosting.
Cake Pan Conversion Chart
Want to use different pan sizes? Multiply all ingredient weights:
| Pan Size | Multiplier |
|---|---|
| 3 × 6-inch pans | 1x (base recipe) |
| 2 × 7-inch pans | 1x |
| 3 × 8-inch pans | 1.75x |
| 3 × 9-inch pans | 2.2x |
| 3 × 10-inch pans | 2.7x |
For cupcakes: Makes 18–20 standard cupcakes.
Storage and Make-Ahead Tips
Storing Cake Layers
- Wrap cooled cake layers tightly in plastic wrap.
- Refrigerate for up to 3 days or freeze for up to 6 weeks.
Storing Frosting
- Store cream cheese frosting in the fridge for 3–5 days.
- Freeze up to 1 month. Thaw and beat again before use.
Storing the Assembled Cake
- Store in the fridge (covered) for up to 5 days.
- Bring to room temperature before serving.
Troubleshooting Common Issues
| Problem | Possible Cause | Solution |
|---|---|---|
| Dry Cake | Overbaking or too much flour | Bake until just done, use a scale |
| Dense Texture | Overmixing | Mix only until combined |
| Runny Frosting | Overbeating cream cheese | Mix just until smooth |
| Cake Sinks | Underbaked or old leavening | Check baking powder/soda freshness |
Creative Flavor Variations
Want to mix it up? Try these easy tweaks:
- Mocha Cake: Add 1 tsp espresso powder to the cocoa milk mixture.
- Orange Chocolate: Add 1 tbsp orange zest to the batter.
- Salted Caramel Drizzle: Drizzle caramel over the frosted cake.
- Berry Layers: Add raspberry or strawberry jam between layers.
- Spiced Twist: Add a pinch of cinnamon and cayenne for a Mexican chocolate vibe.
Frequently Asked Questions (FAQ)
Q: Can I make this gluten-free?
Yes! Use a 1:1 gluten-free flour blend, but ensure it includes xanthan gum.
Q: Can I make this dairy-free?
Yes. Substitute dairy milk and butter with plant-based versions and use vegan cream cheese.
Q: Can I reduce the sugar?
You can reduce sugar in the cake by 10–15% without affecting structure. Frosting requires sugar for texture—cutting too much may make it loose.
Q: Can I frost the cake the day before?
Yes! In fact, chilling it helps flavors meld. Just bring it to room temp before slicing.
Q: Can I turn this into cupcakes?
Absolutely. Reduce baking time to 18–22 minutes. Yields approx. 18 cupcakes.
Final Thoughts
This Chocolate Cake with Cream Cheese Frosting recipe proves that baking from scratch doesn’t have to be complicated. With the right techniques and thoughtful details, anyone—from a weekend baker to a birthday party host—can create a cake that looks professional and tastes unforgettable.
Its rich cocoa flavor, tender crumb, and luxurious frosting make it a versatile showstopper that works for birthdays, anniversaries, or quiet evenings when only cake will do.
Ready to elevate your baking game? Bookmark this recipe, try your hand at decorating, and share a slice with someone special. You’ll be amazed at the compliments you receive—and they’ll never guess it was this easy.