The Ultimate Blue Velvet Cake Recipe: Easy Steps for a Stunning Cake 2025
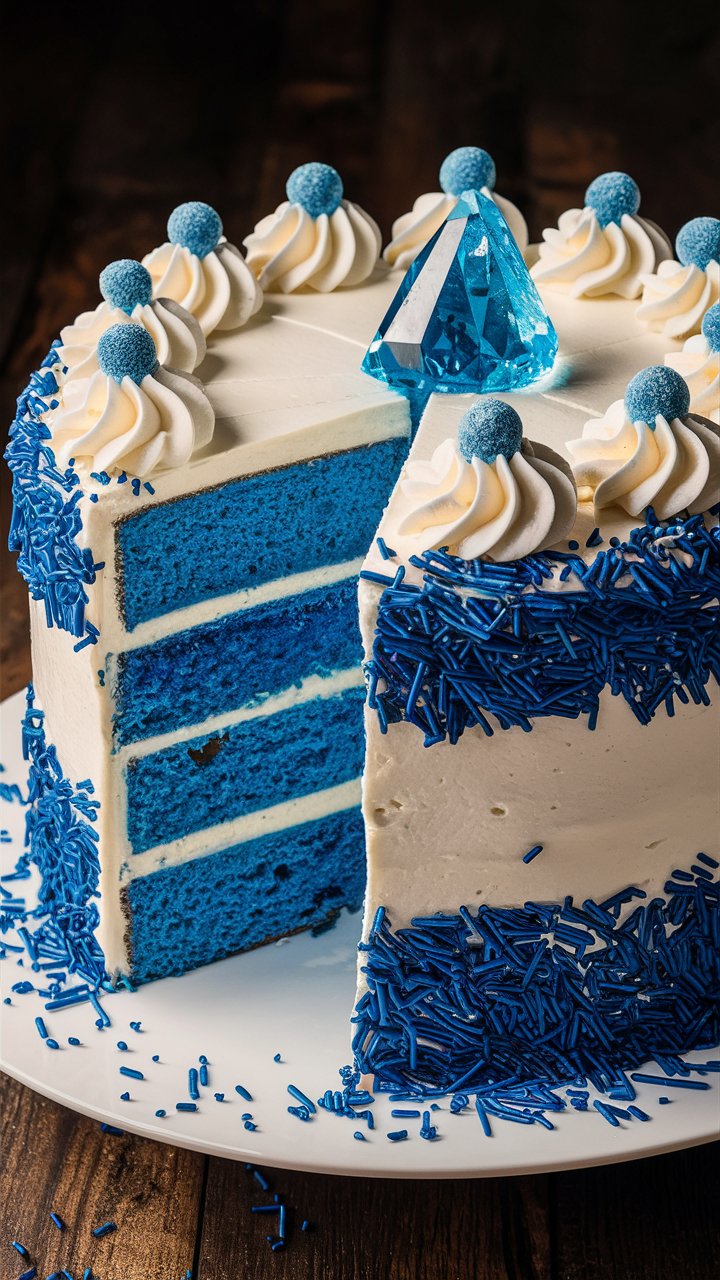
Blue velvet cake is a delightful twist on the classic red velvet cake, boasting the same moist texture and subtle cocoa flavor but with a striking blue color that instantly grabs attention. This cake is perfect for celebrations, birthdays, or any occasion where you want a visually stunning and delicious dessert. Paired with a smooth, tangy cream cheese frosting, the combination is irresistible.
In this comprehensive guide, you will learn everything you need to make the perfect blue velvet cake from scratch — from ingredients and preparation tips to baking, frosting, assembling, and storing. Whether you’re a beginner baker or an experienced one looking to try something new, this step-by-step tutorial will help you create a beautiful cake that tastes as amazing as it looks.
Why Choose Blue Velvet Cake?
While the traditional red velvet cake has been beloved for generations, the blue velvet cake offers a unique alternative that’s equally elegant and tasty. The vibrant blue color adds a fun and festive touch, making it especially popular for themed parties, baby showers (think “it’s a boy”), or summer gatherings.
The flavor profile remains gentle and pleasing — a hint of cocoa balanced with buttermilk’s slight tang, enhanced by a luscious cream cheese frosting that’s smooth and sweet with just the right amount of tanginess.
Ingredients You’ll Need
Getting the right ingredients is key to achieving the best texture, taste, and color for your blue velvet cake. Below is a detailed list along with some tips for substitutions if necessary.
For the Cake Layers:
- Unsalted Butter (Room Temperature): 100 grams (approx. 7 tablespoons)
Tip: Using unsalted butter allows you to control the salt content precisely. - Cake Flour: 254 grams (about 2 cups + 3 tablespoons)
Tip: Cake flour produces a softer crumb. If unavailable, you can substitute all-purpose flour with cornstarch (see substitution section below). - Granulated Sugar: 308 grams (about 1½ cups)
Tip: Don’t reduce sugar too much as it affects texture and moisture. - Eggs: 3 large eggs, at room temperature
Tip: Using room temperature eggs helps with better emulsification and volume. - Vegetable Oil: 142 ml (about ½ cup + 1 tablespoon)
Tip: Use a neutral-flavored oil such as canola or grapeseed oil for moisture and softness. - Buttermilk: 179 ml (¾ cup)
Tip: If you don’t have buttermilk, make a substitute by adding 1 tablespoon vinegar or lemon juice to ¾ cup milk, let it sit for 5-10 minutes. - Unsweetened Cocoa Powder: 11 grams (about 2 tablespoons)
Tip: Use natural cocoa powder for best color; Dutch-processed cocoa powder is darker and may dull the blue color. - White Vinegar: 2 teaspoons
Tip: Helps react with baking soda for leavening and adds tang. - Baking Soda: ½ teaspoon
- Baking Powder: 2 teaspoons
- Blue Gel Food Coloring: 1 tablespoon (or adjust to desired intensity)
Tip: Gel food coloring is preferred as it provides vibrant color without thinning batter.
For the Cream Cheese Frosting:
- Unsalted Butter (Room Temperature): 200 grams (approx. ¾ cup + 2 tablespoons)
Tip: Butter should be soft, not melted. - Cream Cheese (Full Fat, Room Temperature): 400 grams (about 14 oz)
Tip: Use high-quality cream cheese for best taste and texture. - Powdered Sugar (Icing Sugar): 200 grams (approx. 1⅔ cups), sifted
- Vanilla Extract: 2 teaspoons
Equipment Needed
- Three 6-inch round cake pans (or two 7-inch pans)
- Mixing bowls
- Electric hand mixer or stand mixer with paddle attachment
- Measuring cups and spoons or kitchen scale
- Whisk and spatula
- Cooling racks
- Toothpick or cake tester
- Offset spatula or butter knife (for frosting)
Step-by-Step Instructions
Step 1: Prepare Your Cake Pans and Oven
- Preheat your oven to 330°F (165°C).
- Grease the cake pans with butter or non-stick spray, then lightly dust with flour or line with parchment paper for easy removal.
Step 2: Mix the Cocoa-Buttermilk Mixture
- Warm the buttermilk slightly in the microwave for about 1 minute or until it’s just warm (not hot).
- Whisk the cocoa powder into the warm buttermilk until fully combined and smooth. This “cocoa milk” adds flavor and moisture.
Step 3: Combine Dry Ingredients
- In a large mixing bowl, sift together the cake flour, baking powder, baking soda, and granulated sugar.
- Whisk to combine evenly.
Step 4: Cream the Butter and Sugar
- In a separate bowl, using your mixer, beat the room-temperature butter until soft and creamy (about 2-3 minutes).
- Gradually add the sugar and continue beating until the mixture looks light and fluffy (about 3-4 minutes).
Step 5: Add Eggs
- Add the eggs one at a time, beating well after each addition to fully incorporate.
- Make sure the mixture is smooth before proceeding.
Step 6: Add Wet Ingredients and Coloring
- Add the vegetable oil, white vinegar, and blue gel food coloring to the butter mixture. Mix on medium speed until combined.
- Gradually add the cocoa-buttermilk mixture, mixing until fully incorporated but do not overmix.
Step 7: Incorporate Dry Ingredients
- Slowly add the dry ingredient mixture to the wet ingredients in batches.
- Mix on low speed just until combined after each addition. Avoid overmixing to keep the crumb tender.
Step 8: Divide Batter and Bake
- Evenly divide the batter between your prepared cake pans.
- Smooth the tops with a spatula.
- Bake for approximately 25-30 minutes, or until a toothpick inserted into the center comes out clean.
Step 9: Cool the Cakes
- Remove cakes from oven and let them cool in the pans for 10 minutes.
- Then, carefully invert the cakes onto wire racks and allow to cool completely before frosting.
Step 10: Prepare the Cream Cheese Frosting
- In a large bowl, beat the room-temperature butter until soft and creamy.
- Gradually add the sifted powdered sugar in two parts, mixing well after each addition for 4-5 minutes.
- Add cream cheese and vanilla extract, then beat on medium speed until the frosting is smooth and fluffy.
Step 11: Assemble the Cake
- Level the cooled cake layers using a serrated knife if needed to create flat surfaces.
- Place the first cake layer on your serving plate or cake stand.
- Spread an even layer of cream cheese frosting on top.
- Repeat with remaining layers.
- Finally, frost the entire cake with a thin crumb coat, chill for 15 minutes, then apply a final thick layer of frosting.
Tips and Tricks for Perfect Blue Velvet Cake
- Use a kitchen scale: For accurate ingredient measurements, weighing your ingredients is far more reliable than cups or spoons.
- Room temperature ingredients: Always bring eggs, butter, and cream cheese to room temperature before using to ensure better mixing and texture.
- Don’t overmix batter: Overmixing develops gluten, making the cake dense and tough. Mix just until ingredients are combined.
- High-quality food coloring: Gel-based food coloring provides richer and more vibrant blue tones without altering batter consistency.
- Avoid Dutch-processed cocoa: Natural cocoa powder reacts better with baking soda and vinegar to give the right texture and subtle flavor.
- Bake at correct temperature: Keep the oven steady at 330°F (165°C) for even baking and moist crumb.
Substitutions and Dietary Alternatives
- Egg replacements: Use flax eggs, chia eggs, or commercial egg replacers if you avoid eggs.
- Dairy-free: Substitute butter with vegan margarine or coconut oil; use plant-based milk plus vinegar for buttermilk. Use dairy-free cream cheese alternatives for frosting.
- Gluten-free: Use a gluten-free flour blend suitable for cakes, but expect slight texture differences.
How to Decorate Your Blue Velvet Cake
Cream cheese frosting is perfect for decorating because it holds shape well and tastes delicious. Here are a few ideas:
- Simple smooth finish: Use an offset spatula for a clean look.
- Piped borders and rosettes: Use piping bags and tips for elegant designs.
- Fresh berries or edible flowers: Add color and freshness on top.
- Sprinkles or edible glitter: For fun and sparkle.
- Drip icing or glaze: For an artistic effect.
For more creative ideas, you can explore cake decorating tutorials online that suit your skill level.
Storing and Making Ahead
- Cake layers can be baked ahead and frozen for up to 6 weeks when wrapped tightly in plastic wrap and foil. Thaw at room temperature before frosting.
- Cream cheese frosting can be stored in the refrigerator for up to a week or frozen for up to a month. Whip it again after thawing for best texture.
- Fully assembled cakes are best eaten within 3-4 days when stored in the refrigerator.
Frequently Asked Questions (FAQs)
Q: Can I use red food coloring instead of blue?
A: Yes, but that turns it into a traditional red velvet cake. The recipe works with any color gel food coloring.
Q: Why is the cake slightly tangy?
A: The buttermilk and vinegar react with baking soda, giving the cake a subtle tang that balances sweetness.
Q: What if my cake turns out dry?
A: Avoid overbaking and overmixing. Make sure to measure ingredients accurately and keep baking time consistent.
Q: How do I get a vibrant blue color?
A: Use gel food coloring and add enough for desired intensity. Natural cocoa powder and white vinegar help keep the color bright.
Conclusion
Making a perfect blue velvet cake is easier than you think when you follow the right recipe and techniques. The moist, tender crumb combined with the striking blue color and creamy tangy frosting makes for an unforgettable dessert centerpiece. Whether for a special occasion or a fun baking project, this blue velvet cake is sure to impress your family and friends.
Give this recipe a try, enjoy the process, and savor every bite of your homemade masterpiece!