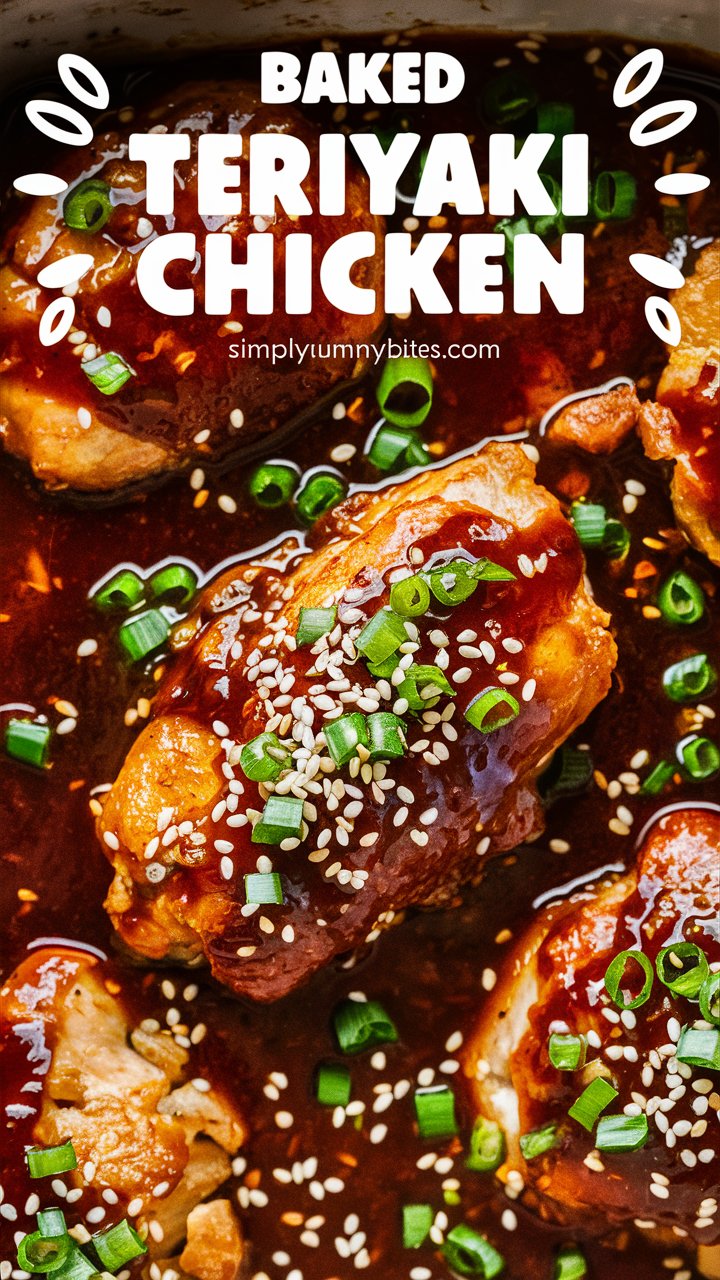
Sticky and Tender Baked Teriyaki Chicken Thighs You Can Make Tonight 2025
Few dishes can match the irresistible combination of sweet, savory, and umami flavors like Baked Teriyaki Chicken Thighs. This comforting meal blends tender chicken with a glossy, sticky teriyaki glaze, perfectly caramelized in the oven to deliver a dish that’s bursting with flavor and texture. Whether you’re preparing a family dinner, meal prepping for the week, or hosting guests, this recipe strikes the ideal balance between simplicity and sophistication.
Unlike stir-fried or pan-seared versions, baking the chicken thighs infuses every bite with juiciness while creating a delightfully crisp skin that locks in the succulent juices beneath. The homemade teriyaki sauce, crafted from scratch with fresh ingredients, elevates the dish beyond the ordinary with its complex layers of garlic, ginger, soy, and sweetness.
In this ultimate guide, you’ll find everything you need: detailed ingredient notes, step-by-step instructions, expert tips, flavor variations, storage advice, nutritional insights, and answers to common questions — all designed to help you make the best baked teriyaki chicken thighs imaginable.
Origins of Teriyaki Chicken
Before diving into the kitchen, it’s worth understanding what makes teriyaki so beloved. Teriyaki is a classic Japanese cooking technique and sauce, where foods—often fish or chicken—are glazed with a shiny, sweet, and savory sauce made primarily from soy sauce, mirin, and sugar.
The word “teriyaki” combines “teri” meaning glaze or shine, and “yaki” meaning grilled or broiled. Though traditionally cooked on a grill or stovetop, baking teriyaki chicken thighs offers a convenient and equally delicious alternative, especially for home cooks.
Chicken thighs are the ideal cut for teriyaki because their higher fat content keeps them moist and flavorful through baking, while their skin crisps up beautifully under the sauce.
Ingredients and Their Roles
A great dish starts with quality ingredients and understanding their roles ensures a balanced flavor profile.
Chicken Thighs
- Bone-in, skin-on chicken thighs are preferred for optimal juiciness and crispy skin.
- Boneless or skinless thighs can work but may require adjusted cooking times and methods.
Soy Sauce
- The salty, umami base of teriyaki.
- Use low-sodium soy sauce to control salt levels without sacrificing flavor.
- Alternatives include tamari for gluten-free versions.
Sweeteners: Honey and Brown Sugar
- Honey adds natural sweetness and a rich floral note.
- Brown sugar deepens the caramelization with molasses undertones.
- You can substitute with maple syrup or coconut sugar for variations.
Rice Vinegar
- Adds brightness and subtle acidity to balance sweetness and saltiness.
- White wine vinegar can substitute if needed.
Sesame Oil
- A small amount contributes a toasty, nutty aroma that enriches the sauce.
Fresh Garlic and Ginger
- Key aromatics that provide depth and warmth.
- Fresh grated ginger is preferred, but ground ginger can be used in a pinch.
Cornstarch Slurry
- Mixed cornstarch and water thickens the sauce into a glossy glaze.
- Alternatives include arrowroot powder or tapioca starch.
Garnishes: Sesame Seeds and Green Onions
- Add texture, visual appeal, and freshness to the finished dish.
Step-By-Step Instructions for Perfect Baked Teriyaki Chicken Thighs
Step 1: Prepare the Teriyaki Sauce
- In a saucepan over medium heat, combine 1/2 cup low-sodium soy sauce, 1/4 cup honey, 1/4 cup brown sugar, 2 tablespoons rice vinegar, and 1 tablespoon sesame oil.
- Add 2 minced garlic cloves and 1 tablespoon freshly grated ginger.
- Stir the mixture well and bring it to a gentle simmer. Let it cook for 3 to 4 minutes to meld the flavors.
Step 2: Thicken the Sauce
- In a small bowl, whisk together 1 tablespoon cornstarch with 2 tablespoons cold water until smooth.
- Slowly pour this slurry into the simmering sauce while whisking continuously.
- Continue cooking for 2-3 minutes until the sauce thickens to a glossy consistency.
- Remove from heat and set aside.
Step 3: Prepare the Chicken
- Preheat your oven to 400°F (200°C).
- Lightly grease a baking dish or line it with foil for easy cleanup.
- Pat 6-8 bone-in, skin-on chicken thighs dry with paper towels to ensure crisp skin.
- Arrange the thighs skin-side up in a single layer.
Step 4: Coat and Bake
- Brush each chicken thigh generously with the prepared teriyaki sauce.
- Reserve some sauce for basting and serving.
- Place the baking dish in the oven and bake uncovered for 35 to 40 minutes.
- Halfway through baking, baste the chicken with more sauce to deepen the flavor and encourage caramelization.
- The chicken is done when the internal temperature reaches 165°F (74°C) and the skin is crisp and browned.
Step 5: Garnish and Serve
- Remove the chicken from the oven and let it rest for 5 minutes.
- Sprinkle with toasted sesame seeds and chopped green onions.
- Serve hot with steamed rice, sautéed vegetables, or a crisp salad.
Expert Tips for Perfect Teriyaki Chicken
- Pat chicken dry before baking to help the skin crisp up instead of steaming.
- Use a meat thermometer to avoid overcooking and drying out the thighs.
- Basting during baking ensures the glaze thickens on the chicken and intensifies flavor.
- For extra caramelization, broil for the last 2-3 minutes, watching closely to avoid burning.
- Marinate the chicken in the teriyaki sauce for 1-2 hours or overnight for deeper flavor infusion.
- To reduce sugar content, decrease honey and brown sugar slightly, or replace with natural sweeteners.
Variations to Customize Your Teriyaki Chicken
- Spicy Teriyaki: Add 1 teaspoon of sriracha or crushed red pepper flakes to the sauce for heat.
- Gluten-Free: Use tamari or coconut aminos instead of soy sauce.
- Low-Sugar: Substitute honey and brown sugar with monk fruit sweetener or erythritol.
- Grilled Teriyaki Chicken: Grill chicken thighs over medium heat for 6-7 minutes per side, basting with sauce.
- Sheet Pan Meal: Add vegetables like broccoli, bell peppers, and snap peas to the baking dish for a one-pan dinner.
Side Dishes That Complement Baked Teriyaki Chicken
- Steamed Jasmine or Basmati Rice: The classic starch to soak up the flavorful sauce.
- Stir-Fried Vegetables: A crunchy medley of broccoli, carrots, and snap peas adds freshness.
- Asian Slaw: Crisp cabbage salad with sesame dressing balances richness.
- Garlic Noodles: Soft noodles tossed in garlic and soy sauce create a comforting side.
- Roasted Sweet Potatoes: Sweet earthiness pairs well with savory teriyaki.
Storage, Reheating, and Meal Prep Tips
- Store leftover chicken in an airtight container in the fridge for up to 4 days.
- For longer storage, freeze portions with sauce in freezer-safe bags for up to 3 months.
- Reheat gently in the oven at 350°F (175°C) covered with foil to retain moisture, or microwave briefly with a splash of water or extra sauce.
- This recipe is ideal for meal prepping; cook in bulk and pair with different sides throughout the week.
Nutritional Information (Approximate per serving)
- Calories: 320 kcal
- Protein: 25 g
- Fat: 18 g (mostly from skin and sesame oil)
- Carbohydrates: 14 g
- Sugars: 11 g (from honey and brown sugar)
- Sodium: 620 mg
This recipe provides a protein-rich meal with moderate fat and sugar content. Adjust sweeteners for lower sugar versions.
Troubleshooting Common Issues
- Sauce too thin: Add more cornstarch slurry gradually and simmer until thickened.
- Chicken skin not crispy: Make sure to pat dry thoroughly and bake skin-side up without covering.
- Chicken dry: Avoid overbaking; use a meat thermometer to check doneness.
- Sauce burning in oven: Baste instead of pouring sauce directly; avoid broiling too long.
- Too salty: Use low-sodium soy sauce and balance with more sweetener or vinegar.
Frequently Asked Questions (FAQs)
Can I use chicken breasts instead of thighs?
Yes, but breasts are leaner and cook faster. Bake at 375°F for 25-30 minutes, and watch carefully to avoid drying out.
Is it necessary to use fresh ginger?
Fresh ginger adds brightness and zing, but 1/2 teaspoon ground ginger works as a substitute.
Can I make the sauce ahead of time?
Absolutely! The sauce keeps well in the fridge for up to a week. Reheat gently before coating chicken.
How do I store leftovers properly?
Cool the chicken before placing it in an airtight container. Refrigerate up to 4 days or freeze up to 3 months.
Can I make this recipe in an air fryer?
Yes! Cook chicken thighs skin-side down at 400°F for 15 minutes, then flip and cook 10 more minutes while brushing with sauce.
Conclusion
Baked Teriyaki Chicken Thighs offer a perfect harmony of taste, texture, and convenience that any home cook can master. From the sweet-salty glaze to the tender meat and crisp skin, this recipe is a crowd-pleaser that elevates weeknight dinners and meal prep alike.
By preparing your own teriyaki sauce and following these detailed steps and tips, you’ll enjoy a restaurant-quality dish in your own kitchen. Try experimenting with the variations and sides suggested here, and don’t hesitate to make it your own.
With this ultimate guide, you’re set for success — delicious teriyaki chicken is just a bake away!