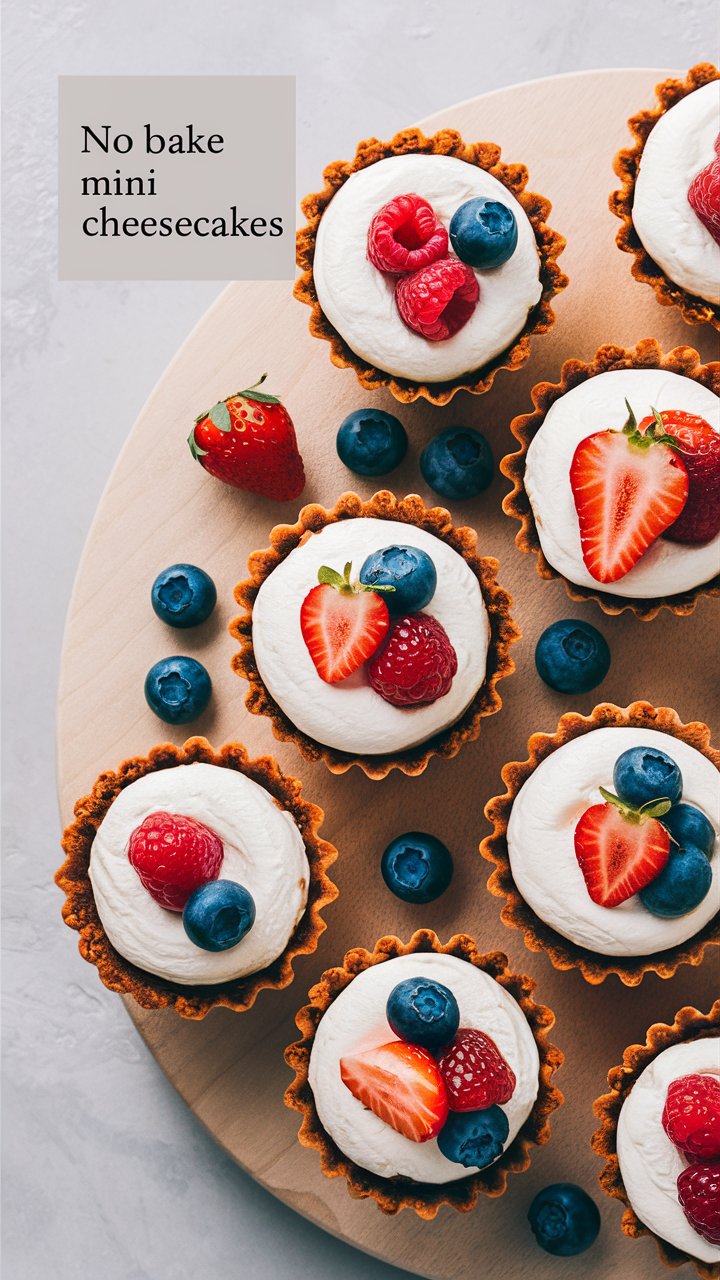
Step-by-Step Guide to Irresistible No-Bake Mini Cheesecakes 2025
No-bake desserts are a lifesaver, especially when the summer heat makes turning on the oven a nightmare. Among these, mini cheesecakes stand out for their creamy, indulgent texture and perfect portion size. These bite-sized treats are elegant enough for parties, simple enough for a weeknight dessert, and endlessly customizable to suit any palate.
Mini cheesecakes offer all the flavor of a traditional cheesecake without the long baking process. They are creamy, rich, and topped with fruity or chocolatey finishes that make each bite irresistible.
In this guide, you’ll discover everything—from ingredient selection to advanced variations, storage tips, and creative ways to serve them—that will turn you into a no-bake cheesecake pro.
Why You’ll Love This Recipe
- No Oven Required – Perfect for summer or quick desserts.
- Creamy, Fluffy Texture – Achieved by folding whipped cream into the cream cheese mixture.
- Individual Portions – Easy to serve and perfect for gatherings.
- Make-Ahead Friendly – Can be chilled overnight for convenience.
- Customizable – Swap toppings, add flavors, or go crustless.
- Kid- and Crowd-Approved – A universally loved dessert.
Ingredients: What You’ll Need
For the Crust
- 1½ cups graham cracker crumbs (or Oreo crumbs for a chocolate twist)
- 1 tablespoon granulated sugar
- 8 tablespoons unsalted butter, melted
For the Filling
- 16 oz full-fat cream cheese, room temperature
- ⅔ cup granulated sugar
- 2 tablespoons sour cream (or plain Greek yogurt)
- 2 tablespoons freshly squeezed lemon juice
- 1 cup heavy whipping cream
For the Topping
- Cherry topping (homemade or store-bought)
- Optional: fresh berries, chocolate shavings, citrus zest
Pro Tips Before You Start
- Use full-fat cream cheese for the best texture and stability.
- Soften the cream cheese completely to avoid lumps.
- Whip the cream separately and fold gently into the cream cheese.
- Use paper liners for easy serving.
- Chill thoroughly; the longer the chilling time, the firmer and creamier the cheesecakes.
Step-by-Step Instructions
Step 1: Prepare Your Pan
Line a standard 12-cup muffin tin with paper liners. If making more than 12 cheesecakes, use small ramekins for extra servings.
Step 2: Make the Crust
- In a medium bowl, combine graham cracker crumbs and sugar.
- Pour in melted butter and mix until all crumbs are moistened.
- Press about 2 tablespoons of mixture into each liner to form an even crust.
Pro Tip: Use the bottom of a small glass to press the crust evenly.
Step 3: Beat the Cream Cheese Mixture
- In a large bowl, beat cream cheese and sugar on medium-high speed until smooth (~3 minutes).
- Scrape the bowl sides and add sour cream and lemon juice. Beat for another minute.
Step 4: Whip the Cream
- Clean your mixer or use a separate bowl.
- Beat heavy cream until stiff peaks form (~3 minutes).
Step 5: Fold and Fill
- Gently fold whipped cream into the cream cheese mixture until light and fluffy.
- Spoon filling into each liner, smoothing the tops with a spoon or spatula.
Step 6: Chill Thoroughly
- Refrigerate for at least 6 hours or overnight.
- Cover loosely after 2 hours to prevent condensation.
Step 7: Add the Topping
- Prepare or chill your cherry topping.
- Spoon generously over each mini cheesecake before serving.
Step 8: Serve and Enjoy
Remove paper liners carefully while cold. Pair with fresh berries, espresso, or sparkling wine for extra elegance.
Creative Variations
Fruit Toppings
- Blueberry compote
- Strawberry glaze
- Lemon curd
Chocolate Twists
- Cocoa powder in filling
- Chocolate ganache drizzle
- Crushed chocolate cookies as crust
Crust-Free
- Spoon filling directly into dessert cups for a low-carb version
Citrus Infusion
- Add lemon or orange zest into filling for extra brightness
Advanced Tips for Perfection
- Avoid overfolding: Keeps the mixture airy.
- Room temperature ingredients: Ensures smooth filling.
- Chill in stages: Initial 2 hours uncovered, then cover for overnight setting.
- Presentation: Top with edible flowers or mint for parties.
Storage Tips
- Fridge: Airtight container, up to 5 days
- Freezer: Wrap without topping, store up to 1 month
- Serving after freezing: Thaw overnight in the fridge
Frequently Asked Questions (FAQ)
1. Can I make these ahead of time?
Yes! Chilling overnight ensures perfect texture and flavor.
2. Can I use store-bought toppings?
Absolutely. Just chill before serving.
3. Do I have to use sour cream?
No, plain Greek yogurt works as a substitute.
4. Can I skip lemon juice?
Not recommended; it balances sweetness and enhances texture.
5. Will mini muffin tins work?
Yes, adjust crust and filling amounts per cup.
6. Can I use whipped topping instead of cream?
Yes, but the texture will be slightly less fluffy.
7. Do I need a stand mixer?
No; a hand mixer works perfectly.
Serving Suggestions
- Elegant Parties: Top with fresh berries and a drizzle of chocolate or caramel.
- Casual Gatherings: Serve with coffee or tea for afternoon indulgence.
- Kids’ Treats: Colorful sprinkles or crushed candy toppings make it fun.
Why Mini Cheesecakes Are Perfect for Any Occasion
Mini cheesecakes combine the indulgence of a full cheesecake with convenience. No slicing, no mess, and every guest gets a perfect portion. They are perfect for:
- Birthdays and holidays
- Baby showers and weddings
- Office parties and potlucks
- Casual family desserts
Troubleshooting Common Issues
- Filling too soft: Check cream cheese temperature; ensure proper chilling.
- Crust crumbles: Press firmly and consider adding extra butter.
- Toppings runny: Chill sauce or reduce liquid in homemade fruit toppings.
Conclusion
No-bake mini cheesecakes are a dream dessert: creamy, elegant, and easy to make. Their versatility allows endless creativity—from fruity toppings to chocolate twists. Perfect for parties, celebrations, or a simple indulgent treat, these cheesecakes will always impress.