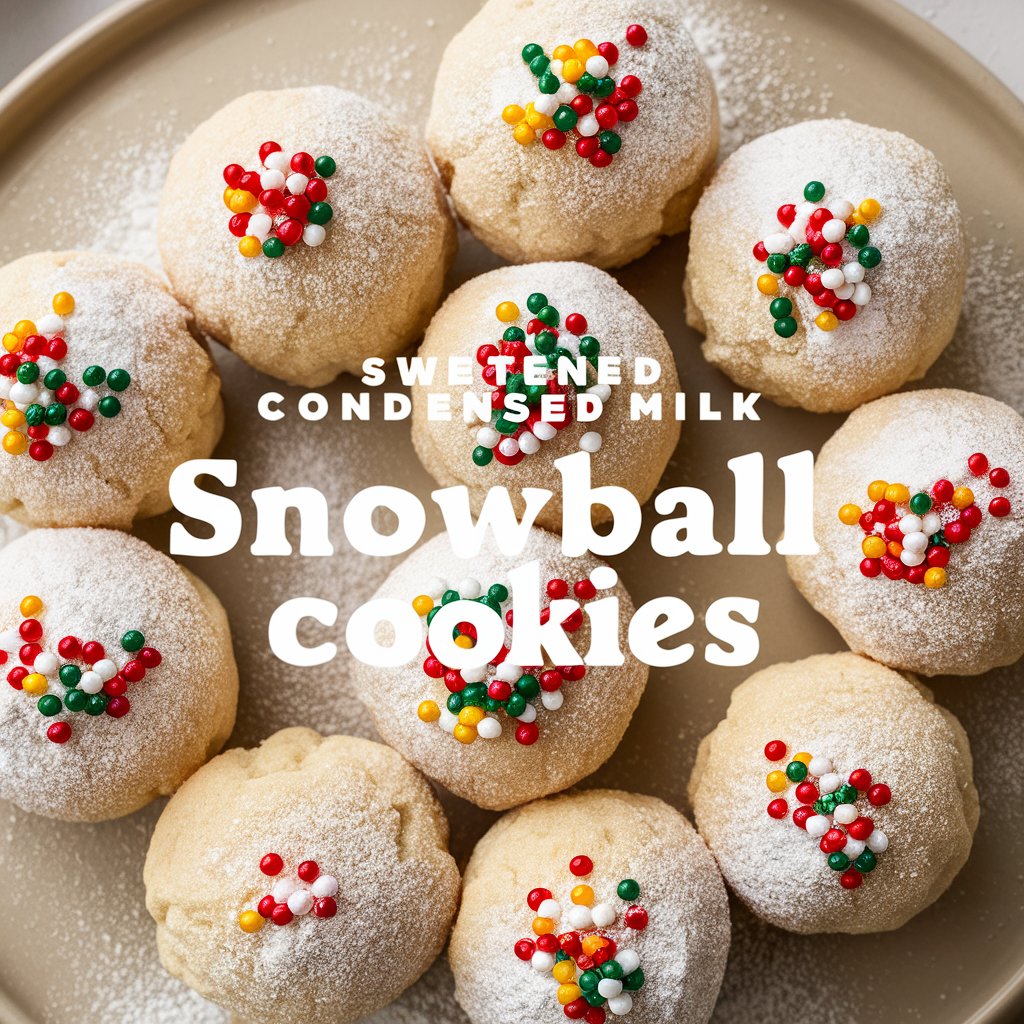
Soft & Sweet Condensed Milk Cookies That Look Like Snowflakes2025
Imagine biting into a cookie so tender and soft it feels like it’s melting on your tongue. Now imagine it’s coated in a delicate snowfall of powdered sugar, subtly sweetened with creamy condensed milk. That’s the experience Condensed Milk Snow Cookies offer—warm, nostalgic, and delightfully simple.
These cookies are not only visually enchanting but also easy to make, even for beginners. The smooth richness of butter meets the dense sweetness of condensed milk to create a cookie that feels like a holiday hug. Whether you’re baking for a winter gathering, preparing edible gifts, or simply craving something soft and sweet, this cookie recipe is your new favorite go-to.
2. What Makes These Cookies Unique?
There are hundreds of cookie recipes out there, but Condensed Milk Snow Cookies have a signature identity:
- Soft, Shortbread-Like Crumb: Thanks to the absence of eggs and the inclusion of sweetened condensed milk.
- Snowy Appearance: Rolled generously in powdered sugar while still warm.
- Simple Ingredients, Big Flavor: No fancy extras, yet bursting with buttery richness.
- No Mixer Needed: You can mix the dough with a spoon or spatula—perfect for small kitchens or quick prep.
They’re a cross between a sugar cookie and a meltaway, with a smoother, richer profile.
3. The Science Behind the Snow Cookie
Why do these cookies have such a delicate, melt-in-your-mouth texture?
- Butter as the Fat Base: Butter contributes both flavor and tenderness.
- No Eggs: Without eggs, the cookies lack chewiness and instead become crumbly and soft.
- Condensed Milk: It acts as a binder and a sweetener, adding smoothness.
- Powdered Sugar Instead of Granulated Sugar: It dissolves more easily and keeps the texture soft.
This combination means you get a cookie that is light, not crisp, and creamy rather than crumbly.
4. Essential Tools You’ll Need
To make this recipe successful, you’ll want to gather:
- A large mixing bowl
- Measuring cups and spoons
- A hand mixer or wooden spoon
- Baking sheets
- Parchment paper or silicone baking mats
- Cooling racks
- Fine mesh sieve or sifter (for the powdered sugar)
Optional: Cookie scoop for even shapes and cookie tins for gifting.
5. Ingredient Breakdown and Purpose
Let’s take a deeper look at each ingredient and its role:
🧈 Unsalted Butter (1 cup / 226g)
- Provides structure, richness, and that classic buttery flavor.
- Note: Always use softened butter for easy mixing.
🥫 Sweetened Condensed Milk (½ cup / 120ml)
- Acts as both binder and sweetener.
- Adds moisture and a caramel-like richness.
🌾 All-Purpose Flour (2 cups / 240g)
- Creates structure. Sift to ensure lightness.
🍚 Powdered Sugar (½ cup in dough + extra for rolling)
- Blends easily and provides that soft bite.
🍦 Vanilla Extract (1 tsp)
- Elevates flavor and aroma.
🧂 Salt (¼ tsp)
- Enhances all other flavors and balances the sweetness.
6. Step-by-Step Baking Instructions
Step 1: Prep Your Space
- Preheat oven to 325°F (163°C).
- Line baking sheets with parchment or a silicone baking mat.
Step 2: Cream the Butter
- In a large bowl, beat the butter until light and creamy (about 2–3 minutes).
- If using a spoon, beat vigorously until smooth.
Step 3: Mix in Condensed Milk and Vanilla
- Add the condensed milk and vanilla extract.
- Stir or beat until well combined.
Step 4: Add Dry Ingredients
- Sift together flour, salt, and powdered sugar in a separate bowl.
- Gradually mix into the butter mixture until a soft, cohesive dough forms.
Step 5: Shape the Cookies
- Roll dough into 1-inch balls.
- Slightly flatten each ball using your fingers or a fork.
Step 6: Bake
- Bake for 12 to 15 minutes or until the edges are just golden.
- Cookies should remain pale on top.
Step 7: Powdered Sugar Coating
- Let cookies cool for 5 minutes on the tray.
- Roll them in powdered sugar while still warm.
- Once fully cooled, roll again or dust for a snowy finish.
7. Tips for Perfect Texture and Appearance
- Avoid Overmixing: Stir until just combined to avoid dense cookies.
- Use Room Temp Butter: Not melted, not cold.
- Powder Sugar Twice: First coat sticks, second coat beautifies.
- Bake Until Edges Turn Pale Gold: Don’t wait for browning on top.
- Store in Airtight Containers: Moisture makes them soggy.
8. Flavor Variations Worth Trying
Change the profile of these cookies by swapping or adding:
| Flavor Twist | How to Add It |
|---|---|
| Lemon or Orange Zest | 1 tsp grated zest in dough |
| Almond Extract | Replace ½ tsp of vanilla |
| Cinnamon Sugar | Mix 1 tsp cinnamon with powdered sugar |
| Crushed Nuts | Fold in ¼ cup of finely chopped nuts |
| Mini Chocolate Chips | Add 2 tbsp to dough (optional) |
9. Making Them Kid-Friendly
Let the kids:
- Roll the dough into balls
- Stamp them with cookie cutters
- Sprinkle extra powdered sugar
- Decorate with edible glitter or sprinkles
The dough is safe to handle since it’s egg-free, and it’s a great sensory experience for little hands.
10. Storing and Freezing for Freshness
Room Temperature:
- Up to 7 days in an airtight container.
Refrigeration:
- Extends life up to 2 weeks. Bring to room temp before serving.
Freezing:
- Freeze baked cookies up to 3 months. Re-roll in sugar after thawing.
- Freeze dough balls and bake directly from frozen (+2 mins bake time).
11. Serving Suggestions for Every Occasion
- Afternoon Tea: With Earl Grey or chai.
- Holiday Platters: Add cranberries and shortbreads.
- Dessert Tables: Pair with whipped cream dips.
- Winter Weddings or Baby Showers: As elegant edible favors.
12. Turning These Cookies Into Beautiful Gifts
- Stack in decorative tins or glass jars.
- Add a personalized tag: “Handmade with love.”
- Include instructions: “Dust again with sugar before serving.”
They’re ideal for:
- Teachers
- Neighbors
- Friends
- Family
13. Gluten-Free and Vegan Modifications
Gluten-Free Version
- Use 1:1 gluten-free flour with xanthan gum.
- Do not substitute with only almond or coconut flour (will crumble).
Vegan Version
- Use plant-based butter.
- Replace condensed milk with coconut condensed milk (available at health stores or online).
14. Troubleshooting Common Issues
| Problem | Reason | Fix |
|---|---|---|
| Cookies too dry | Overbaked or too much flour | Weigh ingredients; watch baking time |
| Spread too much | Butter too soft | Chill dough before baking |
| Didn’t hold shape | Too little flour or warm dough | Measure flour correctly, chill dough |
| Powdered sugar melted | Coated too soon or cookies too hot | Wait 5 mins before first roll |
15. Nutrition Breakdown and Healthier Options
| Per Cookie | Amount |
|---|---|
| Calories | 120 |
| Carbohydrates | 14g |
| Fat | 7g |
| Saturated Fat | 4.5g |
| Sugar | 6g |
| Sodium | 30mg |
Healthier Alternatives:
- Swap ½ butter with unsweetened applesauce.
- Use less powdered sugar in dough (but not for rolling).
- Substitute whole wheat pastry flour for more fiber.
16. Frequently Asked Questions (FAQs)
Q: Can I make these in advance?
Yes! Dough keeps in the fridge for 24 hours, or you can freeze baked cookies for up to 3 months.
Q: Why aren’t my cookies as soft as expected?
Most likely overmixed or overbaked. Stick to 12–15 minutes and don’t press them too flat.
Q: Can I use regular sugar instead of powdered?
Not recommended. Granulated sugar changes the texture.
Q: Can I decorate these with icing?
You can, but it may clash with the snowy aesthetic and flavor. Consider edible glitter or colored sugar.
17. Final Thoughts
Condensed Milk Snow Cookies are a magical blend of ease, elegance, and flavor. With just a few ingredients, you can craft something that looks as good as it tastes—soft, snowy, and rich with nostalgia. These cookies are the kind you make once and then crave again and again.
Whether you’re baking them for guests, gifting them during the holidays, or sneaking one with your evening tea, these cookies are a celebration of simple, cozy pleasures.


