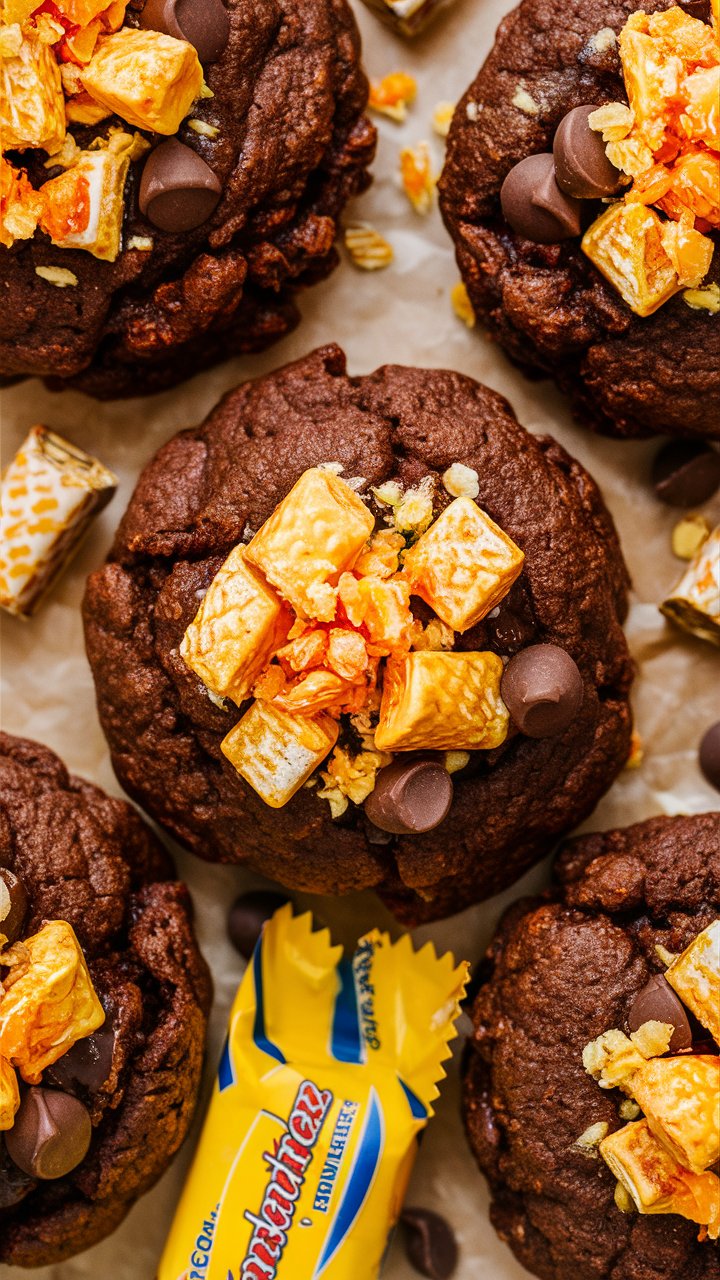
Quick & Delicious Butterfinger No Bake Cookies Recipe 2025
Nothing beats the joy of indulging in a sweet treat that is easy, nostalgic, and utterly irresistible. Enter Butterfinger No Bake Cookies, a delightful twist on the classic no-bake cookie. Chewy, chocolatey, and packed with peanut butter and crunchy Butterfinger pieces, these cookies are a perfect way to satisfy your sweet tooth without turning on the oven. Whether it’s a scorching summer day or a last-minute dessert craving, these cookies are your ultimate solution.
In this complete guide, you’ll learn everything from ingredient highlights to step-by-step instructions, plus tips, variations, storage advice, and troubleshooting to make the perfect Butterfinger No Bake Cookies every time.
Why You’ll Love Butterfinger No Bake Cookies
- No oven required: Perfect for hot summer days or when you don’t want to heat up the kitchen.
- Quick and easy: Ready in minutes, making them ideal for busy schedules.
- Chewy and crunchy: Classic no-bake texture combined with Butterfinger bits for that satisfying crunch.
- Kid-friendly and party-ready: A guaranteed hit at potlucks, birthday parties, or after-school snacks.
- Minimal cleanup: Only one pot and a baking sheet are needed.
Ingredients You’ll Need
Butter
Butter adds richness and ensures a smooth, creamy base. Use unsalted butter to control sweetness.
Unsweetened Cocoa Powder
For a deep, chocolatey flavor that balances the sweetness of the Butterfinger candy and sugar.
Granulated Sugar & Milk
Sugar provides sweetness, while milk helps dissolve it, creating the sticky, chewy base that holds the cookies together.
Peanut Butter
Adds creaminess, flavor, and binding power. Choose smooth peanut butter for even mixing, or crunchy for added texture.
Quick Oats
Classic no-bake cookies rely on quick oats for structure and chewiness. Avoid old-fashioned oats—they can make the cookies too dense.
Vanilla Extract
Enhances all the flavors and adds a warm, aromatic undertone.
Butterfinger Candy
The star of the show. Chop Butterfinger bars into small pieces to fold into the mixture, giving a sweet, crunchy, peanut-buttery bite in every cookie.
Pro Tips Before You Start
- Use quick oats for a softer, chewier texture.
- Stir constantly once boiling to prevent the mixture from burning or forming clumps.
- Cool slightly before adding Butterfinger pieces to maintain their crunch.
- Work quickly when scooping—the mixture sets fast.
- Extra candy on top before cookies firm up adds visual appeal and extra crunch.
How to Make Butterfinger No Bake Cookies
Step 1: Prepare the Base
In a large saucepan, combine butter, cocoa powder, sugar, and milk. Heat over medium heat, stirring frequently to ensure a smooth mixture. This chocolatey base is the foundation of your cookies.
Step 2: Boil and Stir
Bring the mixture to a rolling boil and continue boiling for 90 seconds, stirring constantly. This ensures the sugar dissolves fully, creating a sticky texture that will help the cookies set properly.
Step 3: Mix in the Good Stuff
Remove the pan from heat. Add peanut butter, quick oats, and vanilla extract. Stir until smooth and evenly combined. Fold in the chopped Butterfinger pieces gently to prevent them from melting completely.
Step 4: Drop Onto a Baking Sheet
Line a baking sheet with parchment paper. Using a spoon or cookie scoop, drop mounds of the mixture onto the sheet, leaving space between each cookie.
Step 5: Finish with a Crunch
Sprinkle additional chopped Butterfinger on top of each cookie before they set. This gives them a professional, irresistible appearance and extra crunch.
Serving Suggestions
- Cold milk: A classic pairing for a comforting treat.
- Iced coffee or mocha frappé: Perfect for a summer afternoon pick-me-up.
- No-bake dessert tray: Combine with brownies, fudge, and chocolate bark for an indulgent spread.
- Ice cream topper: Crumble over vanilla or peanut butter ice cream for extra flavor.
- Chocolate drizzle: Melted chocolate adds a decadent finishing touch.
Variations & Substitutions
- Nut butters: Swap peanut butter with almond butter or cashew butter.
- Different candies: Use Snickers, Twix, Reese’s Pieces, or toffee bits instead of Butterfinger.
- Mini marshmallows: Add for a gooey texture and fun variation.
- Chocolate chips: Mix in white chocolate or butterscotch chips for added sweetness.
- Salt contrast: Sprinkle a tiny pinch of sea salt to balance the sweetness.
Storage & Leftovers
- Room temperature: Store in an airtight container for up to 5 days.
- Refrigeration: Keeps cookies firmer and fresher, especially in warm weather.
- Freezing: Can be frozen up to 2 months in a sealed container. Place parchment paper between layers to prevent sticking.
- Serving tip: If chilled or frozen, let sit at room temperature for a few minutes before eating.
FAQs
Q: Can I use old-fashioned oats instead of quick oats?
A: Yes, but expect a denser texture. Quick oats give softer, chewier cookies.
Q: How long do the cookies take to set?
A: About 20–30 minutes at room temperature or 10–15 minutes in the fridge.
Q: Can I melt everything in the microwave instead of stovetop?
A: Technically yes, but stovetop boiling ensures the sugar sets correctly and prevents sticky or runny cookies.
Q: Do I need to refrigerate them?
A: No, but refrigeration prolongs freshness and keeps them firm.
Q: Can I use a different candy bar?
A: Absolutely—Reese’s, Snickers, or chopped toffee work beautifully.
Q: How do I prevent them from spreading too much?
A: Boil the sugar mixture for the full 90 seconds and scoop quickly to maintain shape.
Q: Can I double the recipe?
A: Yes, but scoop in batches to prevent the mixture from setting too fast.
Troubleshooting Common Problems
- Sticky cookies: Sugar mixture may not have boiled long enough. Reheat briefly and stir before scooping.
- Hard cookies: Boiled too long or too much sugar. Adjust boiling time slightly next batch.
- Candy bits melting: Add Butterfinger pieces after the base cools slightly.
Fun Tips & Creative Ideas
- Decorate: Add colorful sprinkles for parties or school events.
- Gift boxes: Perfect for homemade cookie gifts or holiday treats.
- Dessert bar: Crumble cookies over ice cream or parfaits for layered desserts.
- Mix with chocolate drizzle: Drizzle white or dark chocolate for extra appeal.
Conclusion
Butterfinger No Bake Cookies are a perfect combination of chewy, chocolatey goodness and crunchy candy bar magic. They’re easy, quick, and suitable for all ages, making them a staple in any kitchen. Whether you’re preparing a last-minute dessert, packing snacks for a summer picnic, or simply indulging in a sweet treat at home, these cookies hit the sweet spot every time.
With simple ingredients, foolproof steps, and endless variations, you’ll wonder how you ever lived without this recipe. Try it today, experiment with your favorite candies, and enjoy a no-bake treat that’s both nostalgic and irresistible.


