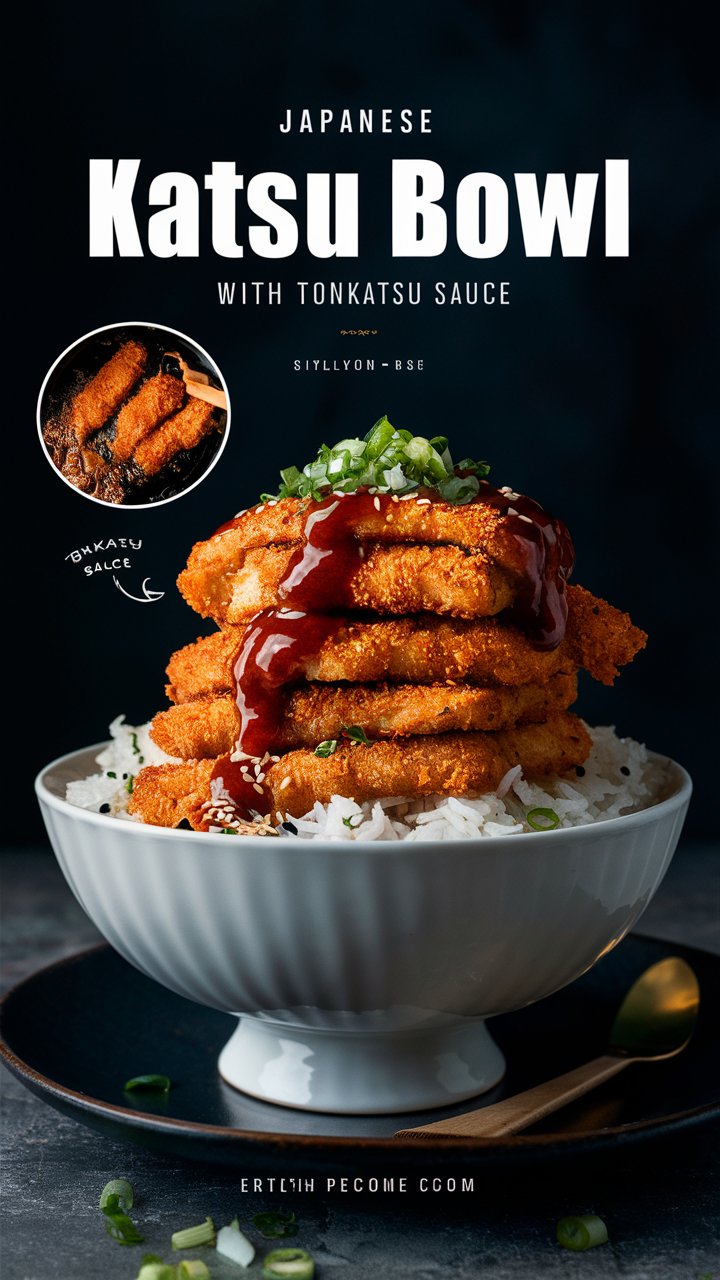
Japanese Katsu Bowls with Tonkatsu Sauce: A Complete Step-by-Step Recipe Guide 2025
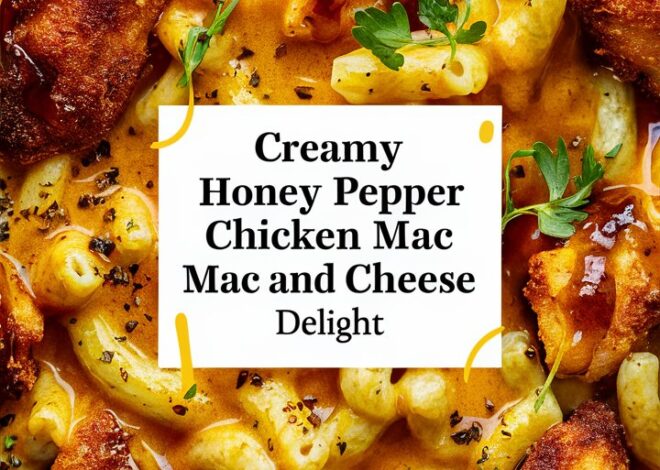
Japanese cuisine is a symphony of textures, flavors, and presentation. Among its most beloved comfort foods is the Japanese Katsu Bowl, a harmonious combination of crispy breaded cutlets served over steamed rice, enriched with creamy mayo and tangy tonkatsu sauce. Whether it’s a cozy family dinner or a casual meal with friends, Katsu Bowls never fail to deliver both satisfaction and delight.
2. The History and Cultural Significance of Katsu
The word “Katsu” originates from the Japanese abbreviation of the English word “cutlet.” It was introduced to Japan during the Meiji era when the country was embracing Western cuisine. Originally derived from European-style breaded meats, the Japanese adapted the recipe to suit their unique palate and cooking methods, resulting in the iconic Tonkatsu (pork cutlet).
Today, Katsu is not just food—it symbolizes celebration, comfort, and even good luck. In Japan, students often eat Katsu before exams because the word “katsu” also means “to win” in Japanese.
3. Why Katsu Bowls Are a Global Favorite
Katsu Bowls have transcended cultural boundaries because they offer:
- Crispiness: Thanks to panko breadcrumbs, which are lighter and flakier than regular crumbs.
- Umami-rich sauces: Especially the Tonkatsu sauce—a complex, tangy, slightly sweet condiment.
- Customizable toppings: Shredded cabbage, green onions, pickles, and sesame seeds elevate the dish.
- Satisfying balance: Protein, carbs, fats, and optional veggies make it nutritionally balanced.
4. Key Ingredients and Their Roles
To craft the perfect Katsu Bowl, each ingredient plays a vital role:
- Protein: Traditionally pork (tonkatsu), but chicken (chicken katsu), tofu, or mushrooms are popular too.
- Panko breadcrumbs: Essential for that signature crunch.
- Flour and egg: Create the sticky base for the crumbs to adhere.
- Neutral oil: For deep or shallow frying.
- Japanese short-grain rice: Sticky and slightly sweet—ideal as a base.
- Tonkatsu Sauce: A fusion of ketchup, Worcestershire sauce, soy sauce, and sugar.
- Japanese Mayo: Often Kewpie, known for its creamy, rich taste.
5. Choosing the Right Protein
Pork
- Cut: Boneless pork loin or chop.
- Flavor: Juicy, slightly fatty, rich.
- Tip: Pound the meat to ½ inch for even cooking.
Chicken
- Cut: Breast or thigh.
- Flavor: Leaner than pork but equally tender when prepared right.
- Tip: Brining chicken before breading can enhance juiciness.
Vegetarian Alternatives
- Tofu: Firm tofu pressed well to remove moisture.
- Eggplant: Thick slices hold up to frying.
- Mushrooms: Portobello or shiitake for meaty textures.
6. The Science Behind the Perfect Crispy Cutlet
Achieving a crispy cutlet is all about technique:
- Dry the protein: Excess moisture leads to soggy breading.
- Three-step breading: Flour → Egg → Panko.
- Oil temperature: 350°F (175°C) is optimal; too low = greasy cutlet, too high = burnt outside.
- Don’t overcrowd the pan: This lowers the oil temperature drastically.
7. Step-by-Step Guide to Making Katsu Bowls
Ingredients:
- 2 boneless pork chops or chicken breasts
- Salt and pepper
- ½ cup all-purpose flour
- 2 beaten eggs
- 1 cup panko breadcrumbs
- Neutral oil
- 2 cups cooked Japanese rice
Instructions:
- Pound and Season: Flatten protein to ½ inch. Season with salt and pepper.
- Set Up Breading Station: Arrange flour, eggs, and panko in bowls.
- Bread the Protein: Coat in flour, dip in egg, then coat with panko.
- Heat Oil: Use a thermometer for precise temperature.
- Fry: 3–4 minutes per side until golden.
- Drain: Place on a wire rack—not paper towels—to maintain crispness.
- Slice and Assemble: Slice the katsu into strips, place over rice.
- Sauce: Drizzle tonkatsu and mayo sauces.
8. Crafting the Iconic Tonkatsu Sauce
Ingredients:
- 3 tbsp ketchup
- 1 tbsp Worcestershire sauce
- 1 tbsp soy sauce
- 1 tbsp sugar or mirin
- ½ tsp Dijon mustard
Method:
- Whisk all ingredients together in a small bowl.
- Adjust sweetness or tanginess to taste.
- Store in a sealed jar in the refrigerator for up to a week.
9. How to Prepare Japanese Mayo Sauce
Ingredients:
- 3 tbsp Kewpie mayo
- 1 tsp rice vinegar
- ½ tsp sugar
- Optional: minced pickles or herbs
Method:
- Mix everything in a bowl until smooth.
- Chill before serving for the best flavor.
10. Essential Tips for Perfecting Your Katsu
- Use panko, not regular breadcrumbs.
- Always rest the breaded cutlets for 10 minutes before frying.
- Use a wire rack to drain, ensuring crispness.
- Slice cutlets just before serving to prevent juices from making the breading soggy.
11. Popular Toppings and Garnishes
- Shredded cabbage
- Thinly sliced green onions
- Toasted sesame seeds
- Pickled ginger
- Nori (seaweed strips)
12. Best Side Dishes to Complement Katsu Bowls
- Miso soup
- Cucumber sunomono (vinegar salad)
- Pickled daikon
- Steamed edamame
13. Storage and Meal Prep Tips
- Cutlets: Cool and refrigerate up to 3 days. Reheat in oven or air fryer.
- Rice: Refrigerate separately, reheat with a splash of water.
- Sauces: Store in airtight containers for a week.
14. Nutritional Breakdown and Health Considerations
Per serving (with chicken katsu):
- Calories: ~680
- Protein: 28g
- Carbs: 65g
- Fat: 35g
- Sodium: 950mg
Health tip: Opt for air frying or baking for a lighter version.
15. Gluten-Free and Vegetarian Adaptations
- Use gluten-free panko and tamari instead of soy sauce.
- Try tofu or eggplant katsu for a vegetarian version.
16. Common Mistakes to Avoid
- Overcrowding the pan
- Oil not hot enough
- Skipping the wire rack for draining
- Using regular mayo instead of Japanese mayo for authentic flavor
17. Expert Chef Secrets for Next-Level Katsu
- Double fry technique for extra crispiness.
- Marinate protein in buttermilk for tenderness.
- Use kombu (seaweed) infused oil for an umami boost.
18. Japanese Dining Etiquette with Katsu Bowls
- Use chopsticks if possible.
- Say “Itadakimasu” before eating, meaning “I humbly receive.”
- Eat the cabbage with dressing to balance the richness of the cutlet.
19. Serving and Presentation Tips
- Use deep bowls to layer rice and katsu.
- Arrange slices fan-like for a restaurant-quality look.
- Drizzle sauces with a squeeze bottle for visual appeal.
20. Frequently Asked Questions
Q1: Can I bake the katsu?
Yes! Bake at 425°F (220°C) for 20–25 minutes.
Q2: What’s the best oil for frying?
Neutral oils like canola, vegetable, or grapeseed.
Q3: Can I freeze katsu?
Yes. Freeze breaded raw cutlets or cooked ones. Reheat in an oven or air fryer.
21. Conclusion: Why Katsu Bowls Are a Must-Try
Japanese Katsu Bowls with Tonkatsu Sauce are more than just a meal—they’re a culinary experience combining tradition, texture, and taste. With customizable proteins, adaptable sides, and sauces you can tweak to your liking, this dish is endlessly versatile.
Whether you’re preparing it for a quiet family night or to impress guests, mastering this recipe ensures you’ll always have a crowd-pleaser in your kitchen.