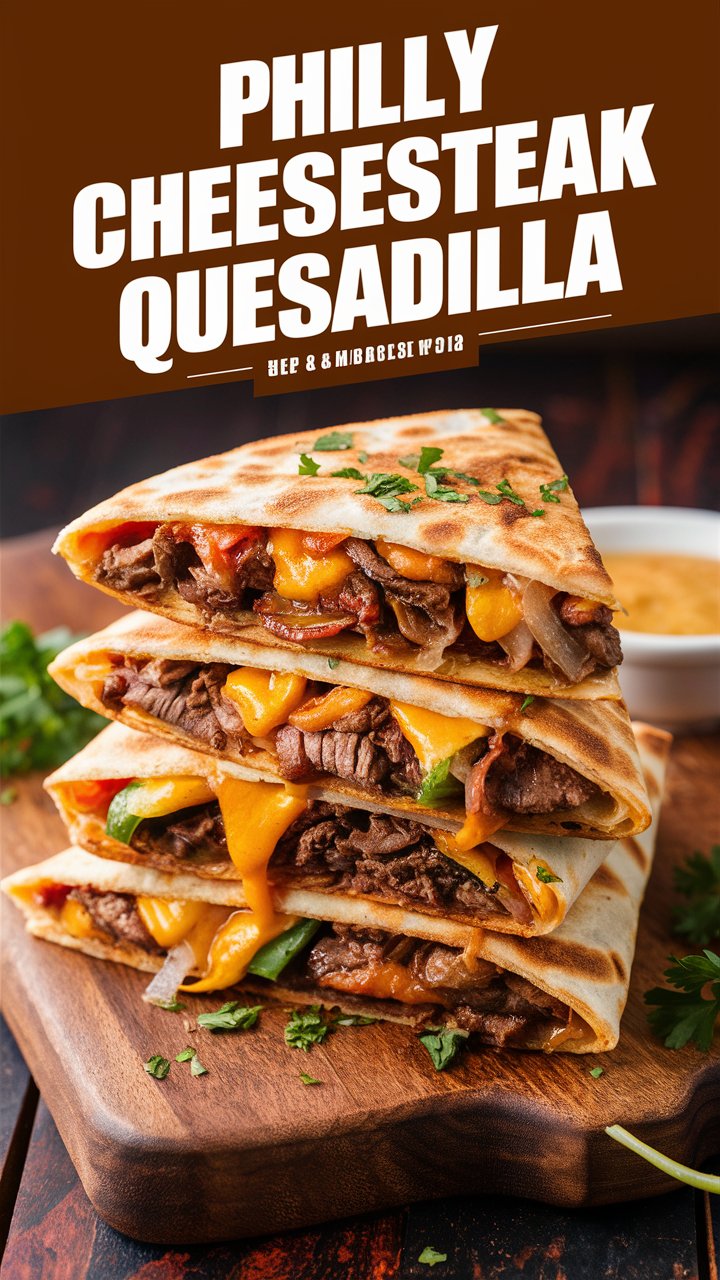
How to Make the Best Philly Cheese Steak Quesadillas (Crispy & Cheesy!) 2025
Few dishes capture the essence of comfort food like a Philly cheesesteak — thinly sliced steak, caramelized onions, and gooey cheese cradled inside a soft hoagie roll. Now imagine merging this East Coast classic with the crispy, golden appeal of a quesadilla. That’s exactly what you get with Philly Cheese Steak Quesadillas — a genius culinary mash-up that delivers savory satisfaction in every bite.
This recipe is not just about melting cheese and crispy tortillas — it’s about transforming simple ingredients into something memorable. Whether you’re planning a cozy dinner, looking for an indulgent weekend lunch, or crafting appetizers for game night, this dish checks all the boxes: quick, satisfying, customizable, and deliciously addicting.
In this comprehensive article, you’ll learn everything you need to know — from ingredient choices and cooking techniques to variations, storage tips, and frequently asked questions. Let’s begin your journey to making the best Philly Cheese Steak Quesadillas ever created.
What Are Philly Cheese Steak Quesadillas?
Philly Cheese Steak Quesadillas combine the essence of two iconic foods: the bold, beefy Philly cheesesteak and the toasted, melty quesadilla. Think thinly sliced steak cooked to perfection, caramelized onions, and heaps of melty cheese all tucked inside a crispy flour tortilla.
This dish is ideal for:
- Busy weeknight dinners
- Late-night cravings
- Game-day snacks
- Casual party appetizers
- Kid-friendly meals
- Customizable family lunches
Unlike traditional cheesesteaks, these are easier to portion, quicker to cook, and require no sandwich buns. All you need is a skillet, some tortillas, and your favorite steak.
Ingredients: What You Need & Why
Essential Ingredients
| Ingredient | Purpose |
|---|---|
| 1 lb beef steak (ribeye/sirloin) | Juicy, flavorful base. Thin slices cook fast and stay tender. |
| 1 small onion, thinly sliced | Adds sweetness, texture, and classic cheesesteak flavor. |
| 1 small green bell pepper (optional) | Adds crunch and color, enhances depth. |
| 1 cup shredded provolone or mozzarella cheese | Melts easily and pairs well with beef. |
| 4 large flour tortillas | Crispy exterior, holds everything together. |
| 1 tbsp olive oil or butter | For sautéing and crisping. |
| Salt and black pepper, to taste | Balances flavors. |
Optional Ingredients for Customization
- Sliced mushrooms
- Jalapeños or chili flakes
- American, Monterey Jack, or cheddar cheese
- Spicy mayo or chipotle ranch for dipping
- Garlic powder or steak seasoning
- Fresh parsley or cilantro for garnish
Step-by-Step Instructions
Step 1: Prep the Ingredients
Before starting, have everything sliced and ready. Thin slicing ensures quick cooking and even distribution.
Tip: Freeze your beef for 15 minutes before slicing — it makes paper-thin slices easier to achieve.
Step 2: Sauté the Vegetables
Heat 1 tablespoon of olive oil or butter in a large skillet over medium heat. Add onions and peppers. Cook for 6–8 minutes, stirring occasionally, until the onions are translucent and starting to brown.
Pro Tip: Add a pinch of salt during cooking to bring out the onions’ sweetness.
Step 3: Cook the Beef
Push the veggies to one side of the skillet. Add the sliced beef to the other side and season with salt and pepper. Sear for 3–5 minutes or until browned and cooked through. Mix the onions and beef together once both are cooked.
Optional: Add a splash of Worcestershire sauce for extra umami flavor.
Step 4: Assemble the Quesadillas
Lay your tortillas on a clean surface. On half of each tortilla:
- Sprinkle a handful of cheese.
- Add a generous scoop of beef and onion mixture.
- Top with more cheese.
Fold the tortilla in half to form a half-moon shape.
Step 5: Toast to Perfection
Wipe the skillet clean and return it to medium heat. Toast each quesadilla for 2–3 minutes per side, pressing gently with a spatula. You’re looking for a deep golden-brown crust and melty cheese inside.
Step 6: Slice & Serve
Cut each quesadilla into triangles. Garnish with chopped herbs if desired. Serve with your choice of dipping sauce — spicy mayo, garlic aioli, ranch, or salsa.
Why This Recipe Works
- Minimal ingredients, maximum flavor
- Customizable based on your taste
- Fast cooking time
- Perfect for meal prep
- Kid and crowd friendly
Ingredient Variations & Custom Add-Ins
Beef Alternatives
- Shaved deli roast beef – For super quick prep.
- Ground beef – Budget-friendly and easy to find.
- Flank steak – Leaner but flavorful when marinated.
- Chicken or turkey – A lighter take on the original.
Vegetarian Option
- Sauté mushrooms, onions, and bell peppers.
- Add spinach or zucchini.
- Use plant-based meat alternatives if desired.
- Double the cheese for richness.
Cheese Options
- Provolone – Mild and traditional.
- Mozzarella – Gooey and neutral.
- Cheddar – Sharp and bold.
- Pepper Jack – Spicy kick.
- Fontina or Gruyère – For gourmet twists.
Tortilla Choices
- Whole wheat – Healthier option.
- Low-carb – Keto-friendly swaps.
- Corn tortillas – Gluten-free alternative (may be smaller and more fragile).
Sauce Pairings & Serving Suggestions
Best Dips
- Spicy mayo
- Garlic aioli
- Chipotle ranch
- Sour cream
- Salsa verde
- Beer cheese sauce
Serve With:
- Pickled jalapeños
- Guacamole
- Coleslaw
- Roasted corn salad
- Sweet potato fries
Storage & Reheating Tips
Refrigerator:
- Let quesadillas cool fully.
- Store in airtight container for up to 3 days.
- Reheat in a skillet or toaster oven to regain crispiness.
Freezer:
- Wrap individual slices in parchment paper.
- Store in freezer bags for up to 2 months.
- Reheat from frozen in a non-stick pan or air fryer.
Nutrition Facts (Per Serving)
| Nutrient | Amount |
|---|---|
| Calories | 420 |
| Protein | 27g |
| Fat | 22g |
| Carbohydrates | 28g |
| Fiber | 2g |
| Sugar | 3g |
| Sodium | 680mg |
Note: Nutritional values may vary based on cheese, beef, and tortilla brands.
Cooking Tips from a Culinary Pro
- Don’t overcrowd the pan. Sear meat in batches if needed.
- Use two kinds of cheese for extra depth.
- Let the meat rest for 2–3 minutes before assembling — locks in juices.
- Use a cast-iron skillet for the best crispy texture.
- Brush tortillas with butter before toasting for extra crunch.
Frequently Asked Questions
Can I make these quesadillas ahead of time?
Yes! Assemble and store uncooked in the fridge. Toast just before serving for best texture.
Can I use frozen beef?
Yes — partially frozen beef is actually easier to slice thin. Fully thaw before cooking.
Is this recipe gluten-free?
Use gluten-free tortillas and ensure your ingredients (like Worcestershire sauce) are certified gluten-free.
What if I don’t have provolone?
Use mozzarella, Monterey Jack, cheddar, or a combination.
Can I add hot sauce to the beef?
Absolutely. Mix a dash of hot sauce into the cooked beef for a spicy kick.
Philly Cheese Steak Quesadillas for Meal Prep
Quesadillas are a meal prep champion. Here’s how:
- Make the filling and store it separately.
- Assemble fresh quesadillas each day in under 5 minutes.
- Double the recipe and freeze half for later.
- Great for school lunches (just pack with a thermos of sauce!).
Kid-Friendly Tips
- Skip onions and peppers for picky eaters.
- Use mild cheeses.
- Serve with ketchup or plain ranch.
- Cut into smaller triangles for easy finger food.
Make It Party-Ready
Hosting a gathering? Here’s how to impress:
- Set up a Quesadilla Bar with assorted toppings and sauces.
- Slice into small wedges and skewer with toothpicks.
- Serve with mini salsa cups or sour cream dollops.
- Add margaritas or mocktails for a festive twist.
Final Thoughts: Why You’ll Keep Coming Back to This Recipe
Philly Cheese Steak Quesadillas are more than a trendy fusion — they’re a revelation in simplicity and flavor. You get the juicy richness of seared beef, the umami punch of onions, the comfort of melted cheese, and the crunch of a perfectly toasted tortilla — all in one compact, soul-satisfying bite.
Whether you’re feeding a hungry family, meal-prepping for the week, or just treating yourself, this dish proves that greatness doesn’t require complicated ingredients or hours in the kitchen.