How to Make the Best Moist Marble Pound Cake from Scratch 2025
There’s something magical about the perfect marble pound cake—that irresistible swirl of rich chocolate and warm vanilla, the moist crumb, and the dense, buttery texture that melts in your mouth. It’s not just a cake; it’s a nostalgic dessert that brings joy to every table, whether it’s a casual tea party or a celebratory gathering.
This article is your ultimate guide to baking the best marble pound cake from scratch. Whether you’re a beginner or an experienced home baker, you’ll discover everything you need: from ingredients and baking science to preparation steps, storage tips, and delightful serving ideas.
Unlike standard recipes scattered across the web, this article delivers a well-researched, easy-to-follow, and superior-quality recipe with professional insights, ensuring the results are always exceptional.
Why You’ll Love This Marble Pound Cake
If you’re looking for a foolproof dessert that’s both delicious and visually striking, this cake checks every box. Here’s what makes it stand out:
- Balanced Flavors: A perfect harmony between buttery vanilla and deep chocolate.
- Moist & Tender Crumb: Thanks to sour cream and precise mixing techniques.
- Elegant Appearance: The marbled swirl creates a showstopping presentation.
- Make-Ahead Friendly: Stays fresh for days and can be frozen for months.
- Beginner-Friendly Instructions: No stand mixer? No problem. Clear, concise steps guide you through every phase.
The Origins of Marble Cake: A Brief History
Marble cake dates back to 19th-century Germany, where bakers combined dark molasses and light-colored batters to create the signature swirled effect. When German immigrants brought the idea to America, chocolate replaced molasses, resulting in the modern marble cake we love today.
The pound cake variation of marble cake takes things a step further by incorporating the rich density of the traditional pound cake—originally made with a pound each of butter, flour, sugar, and eggs. Today’s versions are more refined, with adjusted ratios and extra ingredients for moisture and flavor.
Ingredient Guide: What You Need & Why It Works
🧈 Unsalted Butter (Room Temperature)
- Purpose: Forms the fat base and helps create the signature crumb.
- Why Unsalted? It gives you control over salt levels.
🍚 Granulated Sugar
- Purpose: Sweetens and creates air pockets when creamed with butter, leading to a light texture.
- Tip: Don’t reduce the sugar drastically—it impacts texture, not just sweetness.
🥚 Eggs (Room Temperature)
- Purpose: Add structure and richness.
- Substitution Tip: You can use flax eggs or commercial egg replacers, but texture may vary.
🍦 Vanilla Extract or Essence
- Purpose: Enhances the base flavor and balances the cocoa bitterness.
🍶 Sour Cream
- Purpose: Adds moisture and tang; prevents dryness over time.
- Alternatives: Full-fat Greek yogurt or crème fraîche.
🧁 Cake Flour
- Purpose: Lower protein content ensures a tender crumb.
- DIY Tip: For each cup of all-purpose flour, remove 2 tbsp and replace with 2 tbsp cornstarch.
🧂 Baking Powder
- Purpose: Acts as a gentle leavening agent for slight lift.
🍫 Unsweetened Cocoa Powder
- Purpose: Provides deep chocolate flavor for the swirl.
💧 Hot Water
- Purpose: “Blooms” the cocoa powder, intensifying the flavor.
Equipment Checklist
You don’t need fancy tools to bake this cake. Here’s what you’ll need:
- Mixing bowls (preferably glass or stainless steel)
- Electric hand mixer or stand mixer
- Rubber spatula
- 9×5-inch loaf pan (or bundt pan for an elegant version)
- Whisk
- Measuring cups and spoons
- Kitchen scale (recommended for accuracy)
- Toothpick or skewer (for swirling)
Pro Tips Before You Start
- Always preheat your oven—consistency is key to baking success.
- Use room temperature ingredients to prevent batter curdling and ensure smooth mixing.
- Weigh your ingredients for best accuracy, especially flour and butter.
- Avoid overmixing once the flour is added—it can lead to a tough cake.
- Use fresh baking powder—expired leavening won’t give you the right rise.
How to Make Marble Pound Cake – Step-by-Step
🔹 Step 1: Preheat & Prepare
- Preheat your oven to 330°F (165°C).
- Lightly grease your loaf pan and line with parchment paper for easy removal.
🔹 Step 2: Bloom the Cocoa
- In a small bowl, mix:
- 2 tbsp + 2 tsp (35g) hot water
- ¼ cup (25g) unsweetened cocoa powder
- Stir until smooth and set aside to cool.
🔹 Step 3: Cream Butter and Sugar
- In a large mixing bowl, beat:
- ¾ cup + 3 tbsp (220g) unsalted butter
- 1 cup + 3 tbsp (244g) granulated sugar
- Beat on medium-high for 2–3 minutes until pale and fluffy.
🔹 Step 4: Add Eggs One at a Time
- Beat in 3 eggs (150g) one at a time on low speed.
- Scrape down sides between each addition.
- Do not overmix.
🔹 Step 5: Sift & Add Dry Ingredients
- Sift together:
- 1¾ cups + 2 tbsp (220g) cake flour
- 1.5 tsp (7g) baking powder
- Add dry mixture gradually to the batter on low speed.
🔹 Step 6: Fold in Wet Ingredients
- Gently fold in:
- ¾ cup (170g) sour cream
- ¾ tsp vanilla essence
- Stop mixing when just combined.
🔹 Step 7: Create the Chocolate Batter
- Remove about 370g (around 3 cups) of the vanilla batter.
- Mix in the cocoa-water blend until fully incorporated.
🔹 Step 8: Layer and Swirl
- In your prepared pan:
- Add a layer of vanilla batter.
- Follow with chocolate batter.
- Repeat until both are used.
- Use a skewer to gently swirl the batters 1–2 times in random figure-eight motions.
🔹 Step 9: Bake
- Bake at 330°F (165°C) for 40–50 minutes.
- Check doneness with a toothpick—it should come out clean or with a few moist crumbs.
🔹 Step 10: Cool and Serve
- Let the cake cool in the pan for 15–20 minutes.
- Remove and cool completely on a wire rack before slicing.
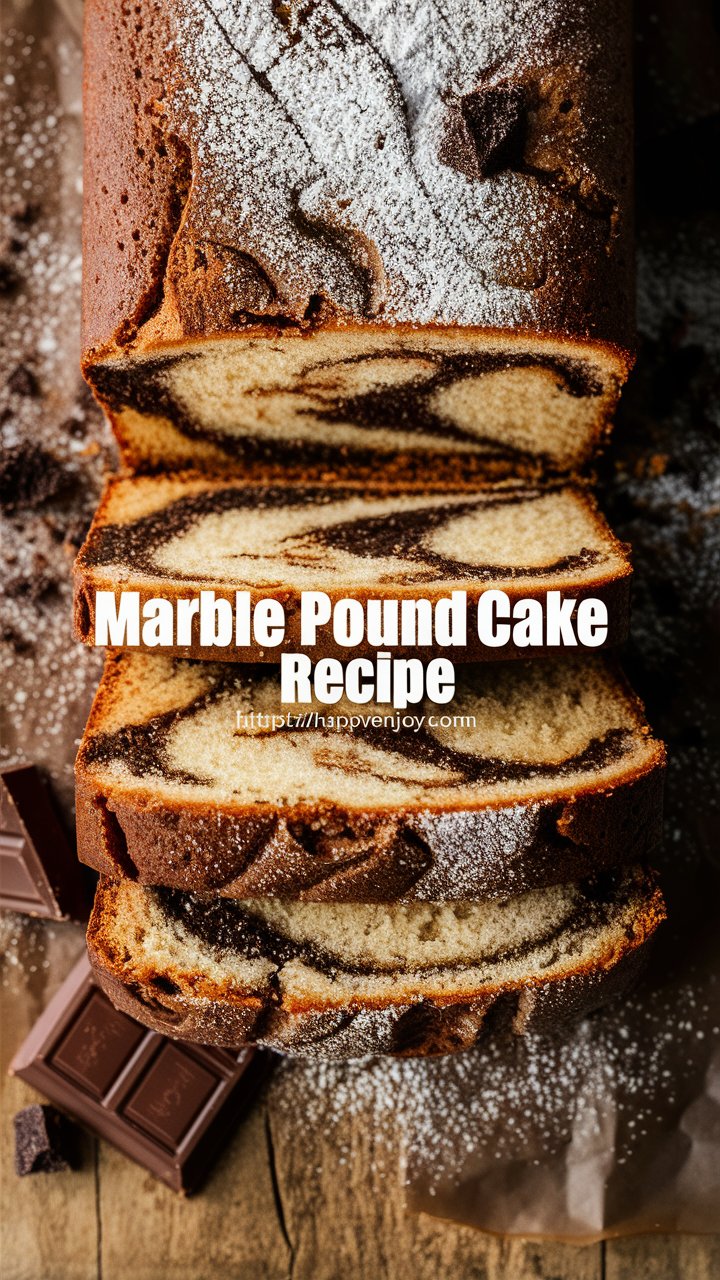
Texture, Taste, and Aroma: What to Expect
When done right, this cake delivers:
- A soft, tender crumb with a slightly dense pound cake texture.
- A balanced flavor profile—buttery vanilla meets rich chocolate.
- A beautiful marbled pattern with each slice—visually impressive and appetizing.
- An aroma that’s buttery, warm, and chocolaty—your kitchen will smell divine.
Serving Suggestions
While this cake is delightful on its own, consider serving it with:
- Whipped cream or crème Chantilly
- A drizzle of caramel or chocolate sauce
- A dusting of powdered sugar
- Fresh berries or fruit compote
- A scoop of vanilla or mocha ice cream
Perfect for afternoon tea, birthdays, or any day that needs a sweet touch.
Storage & Make-Ahead Instructions
Marble pound cake is an ideal make-ahead dessert:
🔸 Room Temperature:
- Store in an airtight container for up to 3 days.
🔸 Refrigerated:
- Wrap tightly in cling film and refrigerate for up to 7 days.
🔸 Frozen:
- Wrap in foil and freezer-safe bag. Freeze up to 3 months.
- Thaw at room temperature before serving.
Variations to Try
Make this recipe your own with fun twists:
- Mocha Marble Cake: Add espresso powder to the chocolate batter.
- Cinnamon Swirl: Replace cocoa with cinnamon sugar for a spicy kick.
- Nutty Delight: Fold in chopped pecans or walnuts.
- Citrus Touch: Add orange zest to the vanilla batter for a refreshing contrast.
- Bundt Version: Use a 12-cup bundt pan and adjust baking time to 50–60 minutes.
Common Mistakes to Avoid
| Mistake | What Happens | How to Fix It |
|---|---|---|
| Overmixing | Tough texture | Mix only until ingredients are combined |
| Cold Ingredients | Curdled batter, poor rise | Always use room temperature items |
| Old Leavening | Flat or gummy texture | Check expiration dates |
| Wrong Pan Size | Overflows or undercooked center | Use 9×5-inch loaf or adjust quantities |
| Underswirling | No marble effect | Swirl enough for a pattern, not fully mixed |
FAQs
❓ Can I make this gluten-free?
Yes! Use a 1:1 gluten-free baking flour blend. Results may be slightly denser.
❓ Can I reduce the sugar?
A small reduction is okay, but it may affect the structure. Try reducing by no more than 10–15%.
❓ Can I use oil instead of butter?
Not recommended. Oil lacks the structure and flavor that butter provides in a pound cake.
❓ How do I prevent cracks on top?
Cracks are natural in pound cakes due to the dense batter. For a smoother top, you can bake at a slightly lower temperature (325°F) and place foil over the top halfway through.
Final Thoughts: Bake With Confidence
This classic Marble Pound Cake Recipe is more than a dessert—it’s a work of edible art. With its delicate crumb, rich swirl of chocolate and vanilla, and stunning presentation, it’s a cake that wins hearts and compliments every time.
Whether you’re baking it for the first time or making it your signature treat, this guide ensures you’ll achieve professional-level results at home.
So, gather your ingredients, preheat that oven, and bake something beautiful today!