How to Make Restaurant-Style Crispy Onion Rings at Home 2025
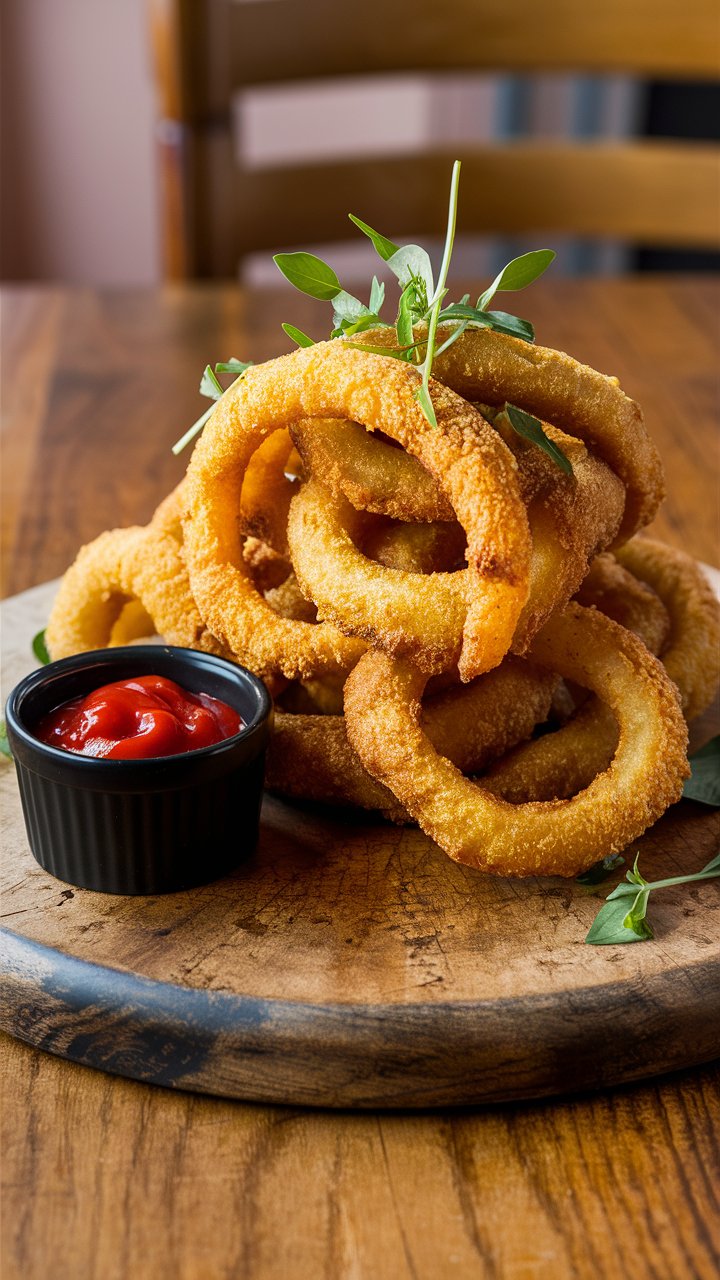
If there’s one snack that instantly brings comfort and nostalgia to the table, it’s the classic onion ring. Golden, crunchy, and perfectly seasoned, onion rings have transcended the realm of fast food to become a staple appetizer at home-cooked meals, parties, and barbecues. This guide will teach you how to make crispy buttermilk onion rings that are superior to anything you can buy in stores, combining professional techniques, foolproof tips, and irresistible flavor.
Whether you’re a seasoned cook or just starting out, this recipe ensures every ring is coated evenly, fried to perfection, and crunchy enough to satisfy the deepest snack cravings.
Why You’ll Love This Crispy Buttermilk Onion Rings Recipe
1. Irresistible Crunch: Using a three-step breading process—flour dredge, buttermilk batter, and Panko coating—creates a texture that’s impossibly crunchy yet light.
2. Perfect Flavor Balance: Buttermilk adds a subtle tang, while spices like paprika and garlic powder enhance the natural sweetness of onions.
3. Versatile Snack: Ideal as a party appetizer, burger companion, or side dish, these onion rings elevate any meal.
4. Homemade Superiority: Unlike store-bought or frozen versions, homemade onion rings are fresher, crispier, and infinitely more satisfying.
5. Customizable: You can adjust spice levels, try different onion varieties, or make them gluten-free without compromising taste or crunch.
Ingredients Breakdown and Highlights
Understanding the role of each ingredient ensures your onion rings come out perfect every time.
Onions
- Yellow onions are the classic choice due to their natural sweetness and firm texture.
- Vidalia onions offer a milder, sweeter option.
- Red onions add a pop of color and subtle sharpness.
Flour and Baking Powder
- All-purpose flour forms the base for the dredge and batter, helping the coating stick.
- Baking powder adds lightness, creating a delicate puff in the batter.
Buttermilk and Egg
- Buttermilk provides tang and helps the batter cling evenly to the onion rings.
- Egg acts as a binder, ensuring the batter adheres well.
Panko Breadcrumbs
- Japanese Panko gives a signature airy crunch unmatched by regular breadcrumbs.
- You can mix in Parmesan or spices for extra flavor.
Spices
- Garlic powder, paprika, salt, and pepper are classic, but you can add cayenne for heat or dried herbs for depth.
Oil
- Use vegetable or peanut oil with a high smoke point. Peanut oil is slightly superior for frying due to its neutral flavor and high temperature tolerance.
Equipment You’ll Need
- Heavy-bottomed pot or deep fryer
- Candy or frying thermometer
- Shallow bowls and baking sheets
- Slotted spoon or spider skimmer
- Wire rack or paper towels for draining
- Whisk and mixing bowls
Proper equipment ensures even cooking, consistent temperature, and minimal oil absorption.
Step-by-Step Instructions
Step 1: Prepare the Onions
- Slice onions into 1/3-inch thick rings for uniform cooking.
- Separate the rings carefully to avoid breakage.
Step 2: Make the Dry Dredge
- In a shallow dish, mix flour, salt, pepper, paprika, garlic powder, and baking powder.
- Dredge the onion rings lightly in the flour mixture and shake off excess.
Step 3: Prepare the Buttermilk Batter
- Whisk together buttermilk and egg until smooth.
- Gradually add the remaining flour mixture to form a thick, pancake-like batter. Adjust with extra flour or buttermilk if needed.
Step 4: Coat in Panko
- Pour Panko breadcrumbs into a shallow bowl.
- Dip each flour-dredged onion ring into the batter, letting excess drip off, then press into Panko, ensuring a thorough coating.
Step 5: Heat the Oil
- Fill your pot with 2–3 inches of oil and heat to 365°F.
- Use a thermometer for accuracy; test with a breadcrumb—it should sizzle immediately.
Step 6: Fry in Batches
- Fry 8–10 rings at a time to avoid overcrowding.
- Fry for 20–30 seconds per side until golden brown.
- Remove with a slotted spoon and drain on a wire rack or paper towels.
Step 7: Serve Immediately
- Serve hot with your favorite dips: ketchup, ranch, sriracha mayo, or chipotle aioli.
- For best texture, enjoy immediately, though leftover rings can be reheated in the oven or air fryer.
Expert Tips for Perfect Onion Rings
- Uniform Slicing: Ensures even cooking and prevents some rings from burning while others are undercooked.
- Oil Temperature: Keep the oil between 360–370°F. Too low = greasy rings; too high = burnt coating.
- Rest the Batter: Letting battered rings rest for 5–10 minutes improves adhesion.
- Drain Properly: Use a wire rack instead of paper towels for best crispiness.
- Avoid Overcrowding: Fry in small batches to maintain oil temperature and crispiness.
Flavor Variations & Substitutions
- Spicy: Add cayenne, chili powder, or smoked paprika.
- Cheesy Crunch: Mix grated Parmesan into Panko.
- Gluten-Free: Use GF flour and breadcrumbs.
- Beer-Battered: Substitute buttermilk with beer for a deeper, richer flavor.
- Air Fryer Option: Preheat to 400°F and cook 8–10 minutes, flipping halfway, for a lighter version.
What to Serve With Onion Rings
- Burgers & Sandwiches: Classic pairing that elevates any beef or chicken burger.
- BBQ Plates: Complement ribs, pulled pork, or grilled chicken.
- Party Platters: Serve alongside sliders, wings, and dips.
- Dips: Ketchup, aioli, ranch, sriracha mayo, honey mustard, or blue cheese dressing.
Nutritional Information (Per Serving – Approximate)
- Calories: 180–220
- Carbohydrates: 22g
- Protein: 3g
- Fat: 10g
- Fiber: 1g
Note: Varies based on oil absorption and onion size.
Storage & Make-Ahead Tips
- Refrigeration: Store cooled rings in an airtight container up to 2 days. Reheat in oven or air fryer at 400°F for 5–8 minutes.
- Freezing: Freeze battered, uncooked rings on a baking sheet, then transfer to a freezer bag. Fry directly from frozen for best results.
- Avoid sogginess: Never store fried onion rings in a sealed container while hot—they’ll steam and lose crunch.
Common Mistakes and How to Avoid Them
- Batter Falls Off: Ensure a dry dredge before battering. Resting helps adhesion.
- Greasy Rings: Oil too cool or overcrowding causes absorption. Maintain temperature and fry in batches.
- Burned Rings: Oil too hot; monitor with a thermometer.
- Uneven Cooking: Slice uniformly; avoid stacking rings in oil.
FAQs About Crispy Buttermilk Onion Rings
Q1: Can I use sweet onions like Vidalia?
A: Yes! They’re sweeter and less pungent, making them ideal for parties.
Q2: Are these onion rings air fryer-friendly?
A: Absolutely! Preheat to 400°F, spray rings lightly with oil, and cook 8–10 minutes, flipping halfway.
Q3: Can I make this dairy-free?
A: Replace buttermilk with almond milk + a teaspoon of vinegar and use a flax egg instead of egg.
Q4: Why are my onion rings soggy?
A: Usually due to low frying temperature or overcrowding the oil. Maintain 365°F and fry in small batches.
Q5: How do I make them extra crispy?
A: Use Panko, double dredge with flour and batter, and ensure oil is hot enough.
Cultural Background: Onion Rings in Popular Cuisine
Originating in the United States in the early 20th century, onion rings quickly became a fast-food favorite, often served alongside fries and burgers. Today, they’re a culinary icon, appearing on pub menus, gourmet restaurants, and at home tables worldwide. This homemade recipe elevates the classic by combining professional frying techniques with quality ingredients.
Serving Ideas for Maximum Impact
- Game Night: Stack rings in a basket lined with parchment and serve with multiple dipping sauces.
- Gourmet Burger Nights: Top onion rings on a blue cheese burger for crunch and flavor.
- Family BBQs: Serve alongside grilled meats and corn on the cob for a complete outdoor feast.
- Cocktail Parties: Mini onion rings can be skewered and served as finger food.
Final Thoughts
Nothing beats the crunch and flavor of homemade crispy buttermilk onion rings. With simple ingredients, precise technique, and these professional tips, you can make a snack that rivals any restaurant. Perfect for family dinners, parties, or just satisfying your craving, these onion rings are sure to become a kitchen favorite.
Try this recipe today, experiment with variations, and enjoy every golden, crunchy bite. Your friends and family will be asking for seconds—and you’ll never want to go back to frozen onion rings again!


