A Refreshing Twist on Dessert: Shamrock Mint Milkshake Pie2025
Table of Contents
- Introduction
- Why You’ll Love This Pie
- Ingredients Breakdown
- Step-by-Step Instructions
- Expert Tips and Tricks
- Flavor Variations & Customizations
- Make-Ahead and Storage Guide
- Nutrition & Dietary Alternatives
- Serving Ideas & Pairings
- Frequently Asked Questions (FAQs)
- Final Thoughts
1. Introduction
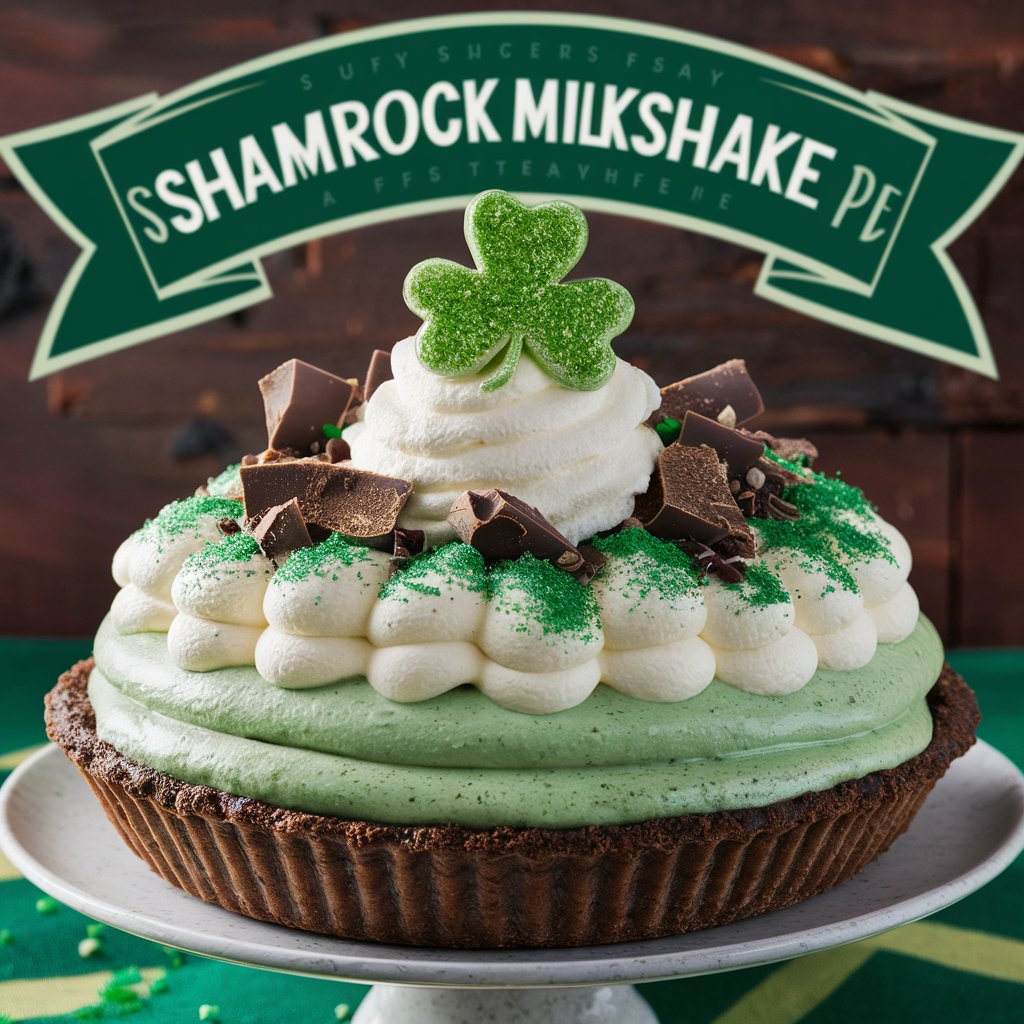
When you’re looking for a dessert that’s festive, refreshing, and ridiculously easy to make, look no further than the Shamrock Mint Milkshake Pie. A nod to the iconic flavors of mint and chocolate, this vibrant green no-bake treat captures the magic of a milkshake in a sliceable pie form. Whether you’re whipping it up for St. Patrick’s Day, a birthday, or simply to enjoy a chilled slice on a warm afternoon, this pie is always a hit.
What makes this dessert truly special? It’s the harmony of creamy mint filling, a buttery chocolate crust, and the luxurious whipped topping that makes each bite melt in your mouth. Better yet, this pie requires no baking, no fancy equipment, and no culinary degree—just a handful of ingredients, a little mixing, and a lot of love.
2. Why You’ll Love This Pie
Still not convinced this is the dessert for you? Here’s why you’ll fall head over heels for this minty masterpiece:
- ✅ No Oven Needed – Perfect for summer days or when your oven is already full.
- ✅ Festive & Fun – Its bright green hue adds a pop of color to any dessert table.
- ✅ Family-Friendly – A great recipe to make with kids and suitable for all ages.
- ✅ Customizable – Make it your own with add-ins, alternate crusts, or toppings.
- ✅ Perfect Texture – Creamy, fluffy filling meets crunchy chocolatey base.
Whether you’re a mint-lover, a chocolate fan, or simply a dessert enthusiast, this pie checks every box.
3. Ingredients Breakdown
Let’s look at what makes this dessert tick. Each ingredient in this recipe serves a specific purpose and can be substituted in various ways to suit your preferences or dietary needs.
🍫 Crust Options
- 1 pre-made chocolate cookie crust Use store-bought for ease, or make your own with crushed Oreos and melted butter.
Alternative Crusts:
- Graham cracker crust (for a slightly caramelized base)
- Shortbread cookie crust (for a buttery touch)
- Gluten-free cookie crust (for dietary needs)
🧁 Creamy Filling
- 1 (8 oz) package cream cheese, softened Gives the pie richness and helps it set.
- ½ cup sweetened condensed milk Adds sweetness and smooth texture.
- 1 cup heavy whipping cream Whipped to stiff peaks for an airy texture.
- 1 tsp peppermint extract Provides the signature minty flavor. You can use less if using mint extract (which is stronger).
- ½ tsp vanilla extract Balances the mint and enhances the creaminess.
- 3–4 drops green food coloring Optional but recommended for visual appeal. Gel works best for vibrant color.
🎀 Toppings (Optional but Encouraged)
- 1 cup whipped topping (or extra whipped cream)
- Chocolate shavings, mint leaves, green sprinkles, or mini chocolate chips for garnish
4. Step-by-Step Instructions
Here’s how to make this cool, creamy dessert from start to finish.
🔧 Step 1: Prepare the Filling Base
In a large bowl, beat the softened cream cheese until it’s smooth and lump-free. Slowly add the sweetened condensed milk, mixing thoroughly to form a thick, silky base.
🧪 Step 2: Add Flavor and Color
Mix in the peppermint extract, vanilla extract, and green food coloring. Stir well until the color is uniform. Adjust the green tone to your liking—soft pastel or vivid emerald.
🎈 Step 3: Whip the Cream
In a separate chilled bowl, whip the heavy cream with an electric mixer until stiff peaks form. Don’t overwhip, or it may turn buttery.
🍃 Step 4: Fold Gently
Using a silicone spatula, gently fold the whipped cream into the mint filling base. This folding technique keeps the air in, resulting in a mousse-like consistency.
🥧 Step 5: Assemble the Pie
Pour the mint filling into the chocolate cookie crust, smoothing the top with a spatula. Make sure the surface is even so it sets uniformly.
🕒 Step 6: Chill and Set
Refrigerate for at least 4 hours, but preferably overnight. For a firmer, ice cream-like texture, freeze for 2 hours before serving.
🍫 Step 7: Garnish and Serve
Top with whipped cream, a drizzle of chocolate syrup, mint leaves, sprinkles, or your favorite festive toppings.
5. Expert Tips and Tricks
Want to make your pie even better? Here are insider tips:
- Chill Your Bowl & Beaters: Helps whip cream faster and gives better peaks.
- Use Full-Fat Cream Cheese: Avoid light versions; they won’t set properly.
- Don’t Skip the Extracts: Vanilla balances the mint and enhances the creamy flavor.
- Let It Set Overnight: Maximum flavor and texture after chilling overnight.
- Freeze Leftovers: Wrapped tightly, slices can be frozen for up to 1 month.
6. Flavor Variations & Customizations
Make this pie your own with these unique ideas:
🎉 Festive Add-Ins:
- Crushed candy canes or mint candies
- Mini chocolate chips
- White chocolate chunks
- Crushed Oreos or Girl Scout Thin Mints
🍨 Topping Alternatives:
- Hot fudge or caramel drizzle
- Marshmallow fluff
- Chopped Andes mints
- Toasted coconut (for a tropical twist)
🍯 Crust Variations:
- Peanut butter cookie crust for sweet-salty contrast
- Almond flour crust for gluten-free
- Brownie base for ultra-chocolate lovers
7. Make-Ahead and Storage Guide
Make-Ahead:
This pie is ideal for prepping ahead of time. Make it up to 48 hours in advance and store it in the fridge until you’re ready to garnish and serve.
Storage:
- Refrigerator: Store covered for up to 3 days.
- Freezer: Freeze for up to 1 month. Thaw 30–60 minutes before serving.
Serving Tip:
If served straight from the freezer, it tastes like a creamy mint ice cream cake!
8. Nutrition & Dietary Alternatives
📊 Estimated Per Slice (8 servings):
- Calories: 320
- Fat: 21g
- Saturated Fat: 13g
- Carbs: 28g
- Sugar: 22g
- Protein: 4g
- Fiber: 1g
🥥 To Make it Dairy-Free:
- Use dairy-free cream cheese (like almond or oat-based)
- Substitute coconut condensed milk
- Use coconut cream instead of whipping cream
- Choose a non-dairy crust or make one from scratch
🌾 To Make it Gluten-Free:
- Use gluten-free cookies or crust base
- Verify all store-bought products are certified gluten-free
9. Serving Ideas & Pairings
Here’s how to elevate your dessert presentation:
☘️ Occasion-Based Serving:
- St. Patrick’s Day: Add edible gold flakes or rainbow sprinkles.
- Summer BBQ: Serve with a scoop of chocolate or pistachio ice cream.
- Birthday Parties: Add candles and chocolate chips inside for a surprise!
☕️ Pair With:
- Hot espresso or cold brew coffee
- Sparkling water with lime
- Baileys Irish Cream (for adults!)
- A chilled glass of mint lemonade
10. Frequently Asked Questions (FAQs)
❓ Can I make this pie without food coloring?
Yes! It won’t have the festive green look but will taste just as delicious.
❓ Can I use Cool Whip instead of whipped cream?
Absolutely. Use the same amount (1 cup). Just fold it gently into the mixture.
❓ What if I don’t have a store-bought crust?
Crush 24 Oreos and mix with 6 tbsp melted butter. Press into a pie dish and chill for 15 minutes.
❓ How do I transport this pie?
Chill overnight, then place in a pie carrier or box with ice packs for transport.
❓ Can kids help make this?
Yes! It’s a fun and safe recipe for children to mix, fold, and decorate.
11. Final Thoughts
The Shamrock Mint Milkshake Pie is more than a dessert—it’s a joyful experience. From its eye-catching green hue to its dreamy texture and mint-chocolate flavor combo, it’s a pie that delights in every bite. Whether you’re celebrating St. Patrick’s Day, hosting a party, or just want something different to serve after dinner, this no-bake pie is your go-to recipe.
It’s quick, fun, customizable, and sure to be a conversation starter. Once you make it, don’t be surprised if it becomes a family favorite for years to come!